plus my Biking History!
//2017 N.B. Photobucket discontinued as they don’t allow you to use URLs on other locations//
Any references to Photobucket links will not work.
After being made redundant on 30 March 2009 I have not found much time to fit anything in but it’s all Gardening, Jobs around the House, nipping here and there to do some shopping or things for my dear Mother-in-Law.
I felt I needed to do something, after working in telecommunications for 45 years I wanted something different. I’d always like motorbikes, although not a continuous rider I do enjoy them.
My first bike was a Honda CD175 in 1974. This was my Learner bike. I passed my test about a month after getting the bike from Nettletons Motorcycles in Gloucester. Nettletons don’t exist any longer but there were a great family bike shop on London Road. I used that bike for a year until around April 1975 when I needed to sell it to get a car (Triumph Herald) due to impending marriage!
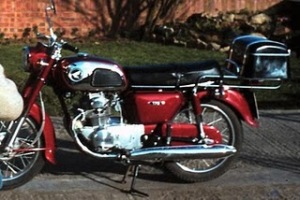
 Gloucester, all year round, but sold it (like a fool!) when I got a company car in 1997. I really enjoyed that bike and commuted through sun, rain, sleet and heavy snow, brilliant bike. Many times I’d pull up at traffic lights and a big bike would pull up alongside me and the rider would invariably say “I had one of those”! In the end I used to say “I know, you had one of these as well!”.
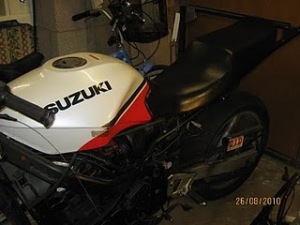
 in the local Gloucester press and was amazed by the number of responses. I finished up with dilapidated, and much abused, Suzuki GSX750FK. It’s a 1989, ‘F’ registration, and has had the rear subframe cut off to make a ‘Street Fighter’ bike.
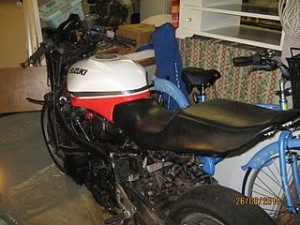
 weeks I spent some time, on and off, removing items such as the seat, petrol tank, air box. This photograph shows the sawn off rear subframe where an attempt has been made to make it into a ‘Street Fighter’ bike. This tinkering and taking things off taught me a lot but still got a long way to go!
 them welded but I thought a complete frame assembly would be a better bet. Just hope I can fit it when it arrives! (N.B. March 2013 – The sub frame does not include the bits that have been cut off but I needed it anyway so it’s ok!).
 Still not got petrol into the carbs to try the engine but that is my next step before I spend any more money.
 Had intended to try the engine earlier, with the ‘Drip Feed’ method (see photo on the left) for the petrol, but not really had time over the past week or so. I always did think this would take me a while and I also need to spend time just poking around and looking at the Haynes manual to get familiar with what I’m looking at. E.G. Not too sure which are the breather tubes and which are the fuel feed tubes to the carbs, not going to get very far firing the engine up if I don’t know that! Incidentally, whoever had sprayed the frame black also sprayed everything else in sight so I had to clean off the paint from the window where the oil level can be checked!
 and molegrips as a key did not initially work. After getting the biggest drill bit that I had in my box and drilling down through
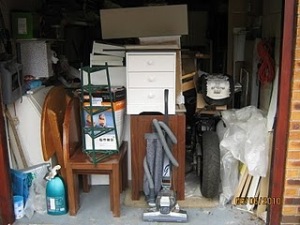
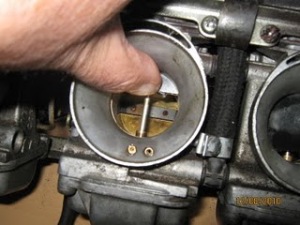 This view is my thumb holding open the vent between the carb and the air filter. It looks dirty in there, with the brown stuff being the carb varnish, but not sure how thick it is. Hoping I can get rid of it with soaking using a can of solvent but only been able to find sprays so far. A forum entry pointed me to a website that says boiling them for 1.5 hours will do it. Not sure about this but it might be worth a try if I can’t get a can of solvent to soak them in.
I don’t know if they were ok to start with (doubt it) or if it was the daily squirting that did it. Before I dismantled them I turned the whole assembly to look for the bowl screws and a load of liquid came pouring out. I think this was a mixture of petrol (from trying to start it over a week ago) and the carb cleaner. I could not see any evidence of varnish so I think it was the cleaner that did it. Just got to refit and see if there is any firing when I try again. If not I guess it’s new plugs and probably HT leads.
Well, after some encouragement from a couple of people I’ve been given new heart and started again. Still got the problem with space, to get worse when the Birmingham house sells of course, but while I can get to it a bit I rolled it out onto the drive today to have a go at the rear part of the frame. About a week ago I put the rear frame, which had been hacksawed off in three bits, back onto the bike. I used round and square tubing into the frame bits to give strength. The round tubing was an excellent fit (20mm) and was nice and tight when I fitted it all together. The square tubing was not so good but it seems to have a good stabiliser with the rest of the round bits fitted. 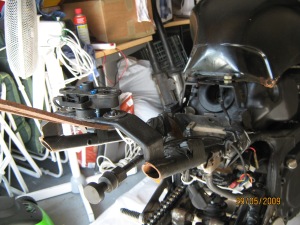 This is what it looked like when I got the bike!
  This is what it looks like now. 06 June 2011 You can see where the bits have been put back as it was directly behind the seat locking arch. The whole of the rear end was removed including the bottom so there were no pillion foot rests.
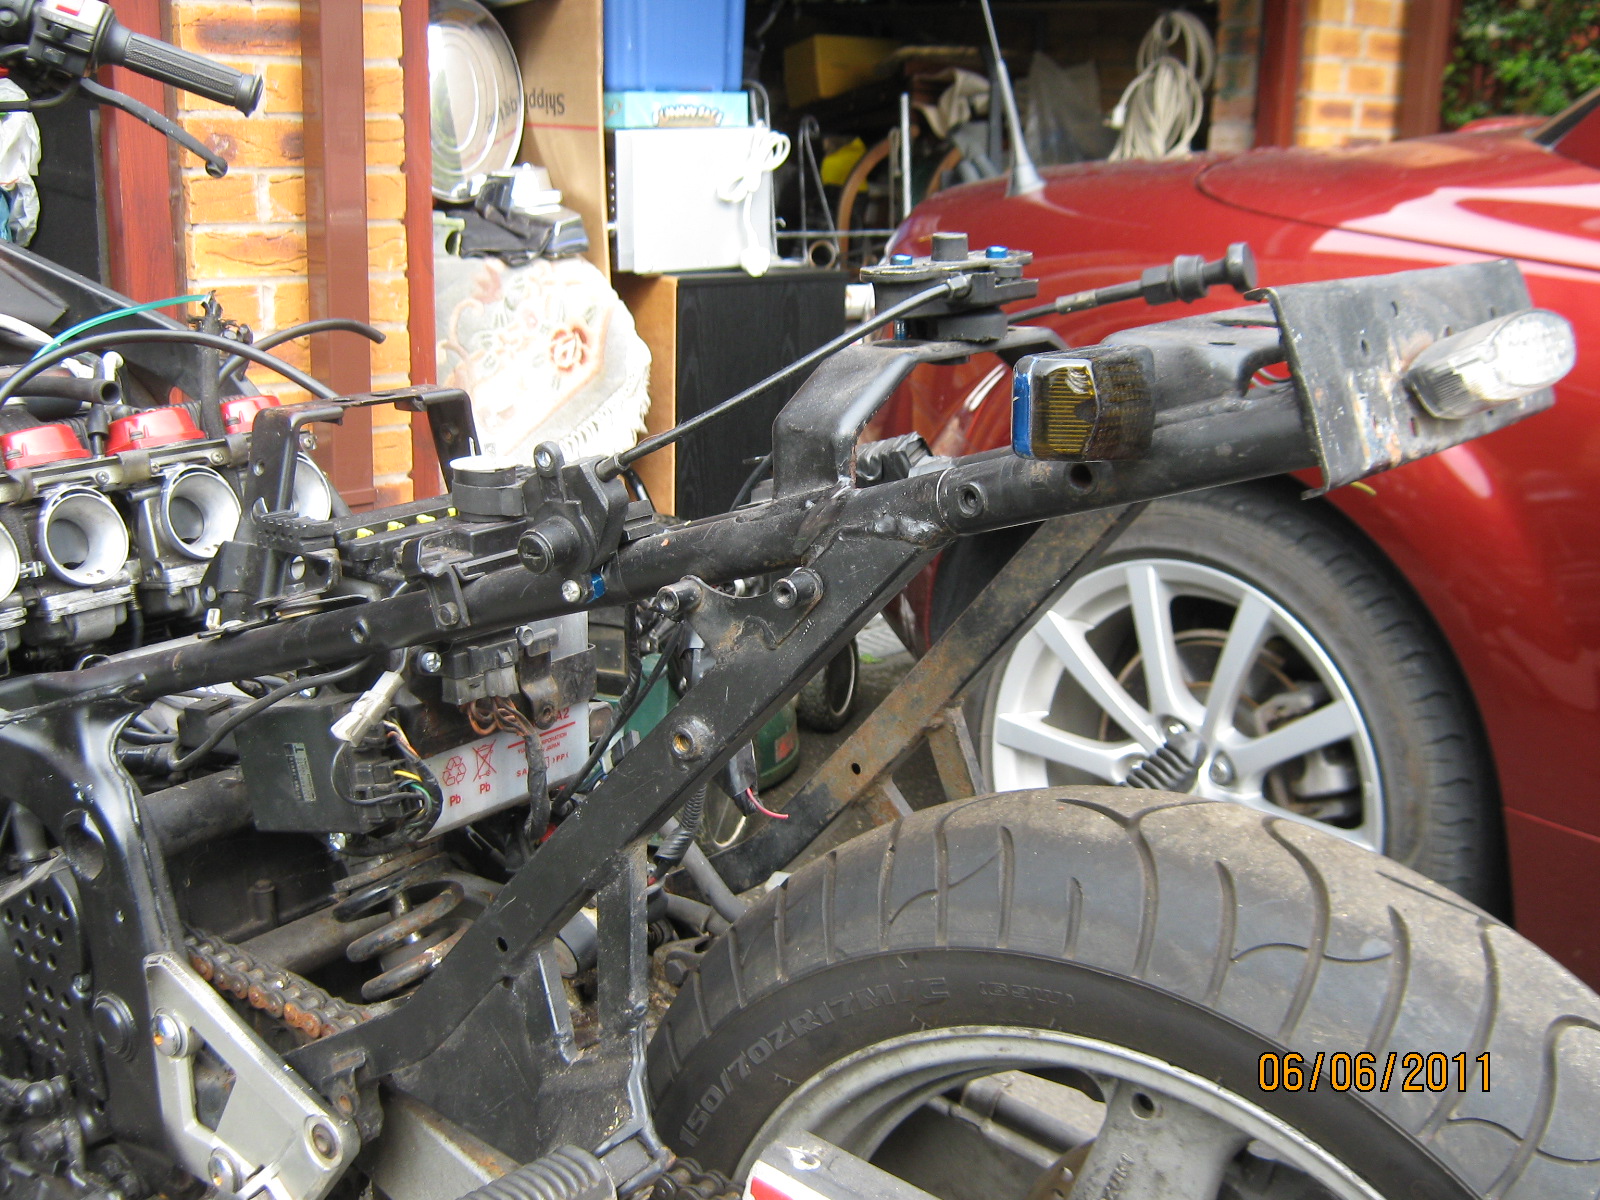
 There was still the problem at the bottom of the right hand side where the square frame meets the bottom near the foot rest. It had been badly hacked away, no idea why it was so bad but it was pointless using the square tubing that I had. So, I cut 2.5 inches of the tube diagonally, corner to corner to make two right angle sections. The hacksaw decided to have a mind of it’s own and went off at an angle making it a little more difficult than I had intended. However, when I put the bits on the bike I just had to cut off a bit to tidy it to make it match up with the other bit.
  This is after I trimmed the bits, they don’t look like they are together but they are just placed there for now until I mix the Steel Weld resin. I made sure there was plenty of scratches and scrapes to ensure good adhesion and slapped plenty of resin on.
  I made sure they were aligned and down over the damaged bit as much as possible and cabled tied it all together. I’ll leave that for a few days, take off the cable ties and tidy it all up with a small file. It looks a mess at the moment but I’m hoping it will be strong enough as I’m not sure I will be able to drill and bolt through but I’ll take a look at this when it’s all tidied up.
So now it looks like this ————-> I’ve a friend at the dog training club I go to and he assures me he could get the engine firing in half an hour. I’m probably going to see him tonight so I’ll try to make a date for him to come and give me a hand. WATCH THIS SPACE !
16 June 2011
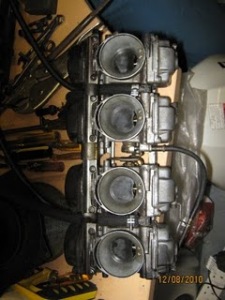
Well, what a commotion I caused on the OldSkool Suzuki forum! They obviously don’t think ‘glueing’ the frame together is a good idea. To be honest I don’t either which is why I used the steel tubing and bolts. I am still trying to get the engine to fire and have also started to prepare the frame for welding. I’m going to ask the bloke across the way if he can help me with that as he is a great car mechanic and also does a bit of welding. I’ve filed around the joins and cut into them to make them a bit countersunk to enable welding. Julian, my friend from the dog club, came along Wednesday this week and had a go but even he could not get it to fire. However, found a few things. The HT leads were not fitted correctly so I’ve done that, not sure what all the tubes do and he’s finding out about that and will let me know. I’ve also had some advice off the OldSkool forum, there are some very helpful people on there. I used the new fuel tank and found it was leaking but today I checked that out and found it was just the bolts on the tap assembly were not tight. (N.B. 23 March 2013 – Not that easy but think it’s sorted now) Julian used Easy Start and it sounded like it was going to go but no joy. After getting some advice from the forum I’ve rearranged the tubes on the tank/carbs and will try again tomorrow. I can’t do it now because if it did start up the noise would be horrendous (no exhaust system on the bike) and the grandchildren are in bed! 19 June 2011 I did try again but no good but I did have some ‘success’ in that there definitely is a spark. Remember I don’t have an exhaust system on the bike, not even front end pipes – After putting petrol through the tubes, and using a can of Easy Start that I got from Halfords I had fire coming out of the exhaust outlets! The carbs were popping away with vapour being shot out of the carbs toward the back of the bike. So, if I’ve got a spark, I’ve got fuel, why is it not starting? Julian mentioned this when he came on Wednesday and it is probably the carbs needing an overhaul and also probably the timing. We don’t know what stroke the firing is taking place on. I’ve got the carb assembly off the bike and will take it to RoadRunner bikes, in Stroud, this coming week. They reckon it might be about £50.00 for the overhaul. __________________________
06 July 2011: New photos on photobucket //2017N.B. Photobucket discontinued as they don’t allow you to use URLs on other locations// at http://s572.photobucket.com/albums/ss162/djrose007/Suzuki%20GSX750F%20Rebuild/CARBS/
31 July 2011
Stripped off all the bits again ready for welding of the frame which I’ve asked my neighbour about. He’s going to ask the chap at work when he can come to look at it, or hopefully do it. I’m missing a couple of bolts for the hangers and I’ve got a bloke on ebay, who was selling front footrests and hangers. I missed the hangers but he’s going to send me the bolts in the mail for a tenner I’ll update again when I get the welding done.
13 August 2011
Well, I haven’t had the welding done yet but I’ve received the bolts for the hangers/footrests, the same guy sent me more bolts for the exhaust flanges and also for the ring around the petrol tank cap. I’ve also bought, off ebay, both sides of the exhaust system (complete), headlamp and clock cluster, Fairing panels (front sides, seat sides and bit that goes across the back over the lights. All for £180.00 but I have to drive to Stamford to pick it all up so that will probably be around £40.00 for petrol. Driving up there on Thursday 18th August.
18 August 2011
When I got there I met Adam’s wife and she was really lovely and told me that Adam had said to give me some other bits as well as those that I had bought. These included hand
 grab for pillion, rear subframe, rear light assembly, bit of plastic trim for the rear light, Front and Rear mudguards. I was really surprised but very pleased and was very appreciative of his generosity. Thank goodness I took my wife’s Rover 25 car instead of my MX-5, partly because of the size of the stuff but also because it rained most of the way back and I wouldn’t have been able to close the roof!!!
22 February 2012
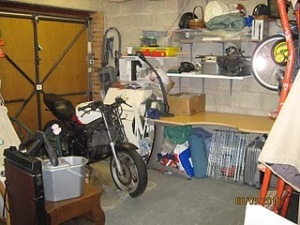
Still can’t get the bike into the garage but all of the bits I got in August 2011 are safely stored away in there waiting for the garages to clear. Meanwhile I’m afraid she is stuck outside albeit well covered in plastic sheeting and a tarpaulin. 
 27 March 2012 There’s some bad news but also some good news. Some tidying up in the garage resulted in enough space being made available to get the bike into a corner so at least it’s not out slowly corroding away with the condensation. I found a fair bit of condensation damage as I’d covered it in plastic and a tarpaulin. This meant that what moisture got underneath, evaporated and condensed and then couldn’t dry off, causing the corrosion. Think I’ve stopped it with a liberal spraying of WD40 and rubbing around the vulnerable bits.

In preparation for frame welding I’ve removed the rear wheel and the rear of the brake pipe. Didn’t bother with a brake pipe clamp as, at least, the fluid will all need renewing anyway.
I’ve got to let the neighbour know that it’s ready. The bloke that is going to do the welding has looked at it and reckons he can do it ok, even the bottom part where there is the gap, says he can fill that and should get  a good solid weld by the time he’s finished it. The rest of it is going to be quite easy he said. Got some of those front and rear garage lifting things since I took this. Only tried the rear so far as there’s not enough room at the front to try the other. Found out they are called Paddock Stands
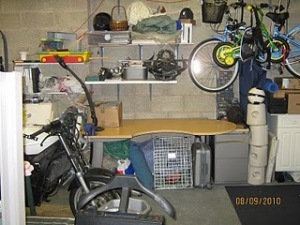
BIG changes – Son, Daughter-in-law and 2 grandsons got their own place and moved out of our house in November. It’s taken a while to get the garage sorted as some of it was Julia’s, younger RAF daughter. Now, in February, it’s not clear and sorted but it’s a huge amount better and I have enough room to get around the bike. Need to sort out the shelves so that I can lay out what I’ve got.

Garage February 2013
You can see my Mother in Law’s, newly MOT’d, little Suzuki Alto and in the other side another Suzuki but it’s the bike! I’ve moved the workbench across to the right hand garage as I want to get a car in one of them and if it goes in the right hand side there wouldn’t be much room for getting to Fridge and Freezer. Fingers crossed, I’ll get going during March. The children’s bike is temporary as they came around the other day but it was raining when they left so the little bike remained in the garage for a few days.
21 February 2013
I’ve started putting on the exhausts so that I can try the engine again but with compression this time! I’ve also sorted the shelves out a bit so I can store the fairing and bits, means I’ve got some space on the workbench. I don’t have a lot of mechanical expertise but I must admit it is nice to have something that looks like I can work on it. Cars nowadays are far too complex to get at the working areas unless you are a very experienced mechanic. As you’ve seen in the blog I’ve not been able to get to it for the best part of 4 years now, had a period of working on it and concentrated on trying to start the engine. This has, so far, failed miserably but advice from the Suzuki OldSkool forum prompted me to get a pair of Exhausts. I didn’t even realise there were two pipes for this model, I presumed it was a four to one exhaust system. Personally I was pretty pleased about it because I think a twin exhaust looks so much better on a bike. I have found it incredibly difficult to locate the exhaust downpipes into the engine block holes so I’ve loosened the oil filled rad (if that’s the right terminology) and it’s much easier.When I’ve got both exhausts fitted I’ll fit the tank and put some petrol in and give it a whirl. Fingers crossed. At least now the garage is fairly clear, not completely because my Mother in Law has moved in with us since our Son, Daughter in Law and two grandsons have found their own place and moved out. At least I’ve got room to work around the bike.

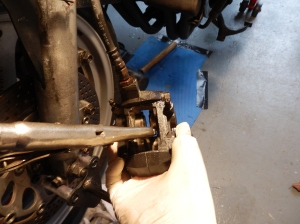
 Even got the shelves sorted! somewhat anyway. This one of the front forks with the paddock stand – is this the correct place to put them? I can’t find anywhere else to use for lifting the front. (N.B. had some advice about locating the front paddock stand in the correct place in March 2013. Thanks yet again Simon).
 Had to loosen the oil rad to get to the exhaust holes. Put the back paddock stand down ‘cos I couldn’t manoeuvre the pipe to align with the exhaust holes.
27 February 2013
Got the exhausts in place but can’t get them tightened up enough. Poured a little oil down into each pot through the spark plug holes and found oil dripping through the manifold. I think I will need to take the exhausts off again and ensure there aren’t any odd bits, looks like they have been subjected to some welding around the area where they fit into the manifold area, which I wouldn’t have expected. However, I’ll see if I can find a way to tighten them any further and have a go at starting the engine.  Just trying to find my old photograph with the text on about which tubes fit where from the tank! I’ve restarted a thread on the Motorbike Forum, link below the photo of the exhaust manifold. Posted a query about the tank to carb tubes so hopefully I’ll be able to understand what goes where before too long! http://www.themotorbikeforum.co.uk/viewtopic.php?f=87&t=47257&p=771751#p771751
  15 March 2013
Big shame that the website for OldSkoolSuzuki has disappeared but found the facebook page. Thanks to this I’m reunited with Simon ‘Frankie Walney’ and posted a query about the tank to carb connections. Simon and Derek Wills replied so I now know what the connections are. 1 & 1 go to the braided fuel pipes, the other one (4) is the vacuum pipe which goes on the tube next to the fuel pipe between carbs 3 and 4. Watch this space!
16 March 2013
Ah well, maybe I’m too optimistic! Terrible smell of petrol in the garage which permeated right through the house resulting in me being in the dog-house! Understandable though. Today I found the problem. Put the tank on yesterday, engine did not start but that really wasn’t much of a surprise. Checking it again this afternoon I found that the fuel pipe between carbs 1 & 2 is split, didn’t notice it before due to the braiding. Also noticed a leak from one of the securing bolts on the tap assembly. Drained the tank, cleaned up with hot soapy water and found a plug in air freshener for the garage!  In the photo you can see a line which is a drip coming down from the front fuel tap bolt. At least I learnt something else. Tap down is ON (needs vacuum to operate), turned right is Prime, to the left is Reserve. Need to order some new fuel line and probably a gasket set for the tap assembly although I did get a socket on it and they both tightened up at least quarter of a turn.
17 March 2013
Just turned it over, without petrol connected, and got some ‘popping’ from the carbs. Terrible smell like burning plastic so stopped immediately. Wondering if the smell is old fuel and ‘sure start’ in the carb pots.
18 March 2013
Got new fuel pipes because I found one with a split in between carbs 1 & 2. They are all very old so probably best to change them all anyway. Fitted all the new pipes, including vacuum, overflow and venting, and awaiting delivery of ‘Heldite’ to seal the sender unit and bolts. 
 I didn’t get the tubing from e-bay as planned, I went to Frasers in Gloucester. It’s not the closest bike parts place but their staff are always incredibly helpful and friendly. Also had a problem in that when I took the bike off the paddock stands the rear wheel was jammed. Guessed this was because I’d taken the brake pipe off, no idea why I did that! Re-attached the pipe, bled the rear brake and hey-presto, it’s all ok again. I need it to be mobile so that I can wheel it outside when I try the engine again. Don’t want to stink the house out with petrol and fumes again!
21 March 2013
I used Heldite on the bolts of the Sender Unit yesterday as there was a leak when I put petrol in the tank, as above. I left it overnight and took the tank outside, on workbench, to put some petrol in to check the leak but it is still leaking. I put the heldite around the base of the sender assembly and around the hole where it fits and put them together when they got tacky. Liberally loaded the bolts with Heldite and put them in nice and tight. I’ll check it again tomorrow, if we don’t get the deluge of snow that’s been promised! Also, this evening, tried to put the air filter box onto the carbs, what an impossible job that is! I’ll try again tomorrow but it is a very difficult thing to do although I did manage it a couple of years ago. Just had a tip from the OldSkoolSuzuki.info facebook page (as mentioned much earlier). Take off the air filter and shove your hand inside to guide the rubber sleeves on. Using a hair dryer to heat the rubber also helps a lot.
22 March 2013 
Well, that worked, got the filter box on, put the filter back into the box, replaced the battery and bracket that the tank sits on and then put bolts into the holes to secure the filter box which immediately made one side nearly pop off ! AAARRRRGGGHHHHH. It’s not completely off so I’ll leave it until after the next fuel/start try.  This is the tank on with Fuel and vacuum pipes connected. I figured the overflow and drain pipes locate into the little brackets towards the back of the filter box and they are then guided, quite nicely, to the bottom of the bike. Must say that one of my best investments in this has been the front and rear paddock stands. Apart from making the bike a little higher it is as steady as a rock. I had some more advice from Simon today about where to fit the front stand. Don’t know what I’d do without Simon and my friend Paul Andrews. Shame they are both so far away but I suppose that encourages me to do it myself. I’m going to have to take it off the stands and wheel it outside to test the firing due to the petrol fumes, and whatever other fumes might ensue! There’s also the fire risk of course. This engine has not been started for at least 8 years that I know of. Evening – Didn’t happen today. After a promising, but cold, morning the weather roared in with gales and heavy rain. No snow in Gloucester yet but it’s not looking good for a few days!
23 March 2013
Nothing done today, awful weather, so I just took a couple of photos of the workspace. 

25 March 2013
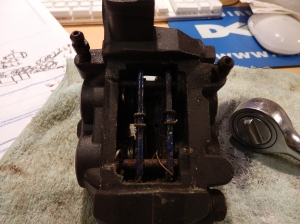
Getting ready to move the bike outside for testing of the engine but the front wheel is extremely stiff. 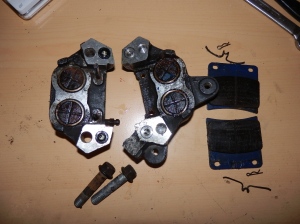 Tried bleeding the brake, as I did with the back when I reconnected the pipe, but no joy. Taken the right hand side caliper off to see how they work and if I can free anything up. Getting some advice from OldSkoolSuzuki.info as usual.
26 March 2013
Got one side of the pistons out but the other side is stuck solid. Trying to soak in brake fluid and a tip on the oldskoolsuzuki is to put it into boiling water to expand it and then it might slip out when cooling. Got the other side caliper off, bleeding front system and removing the inner nipple first which made it easier.
28 March 2013
Over the past couple of days I’ve been struggling to get the pistons out of the calipers. In the end I put the one side back on, topped up with fluid and pumped the pistons out without brake pads in place. One little tip, don’t use your fingers to try to stop the pistons falling out while trying to continue to pump the stuck ones out. This may, as I thought was going to happen, result in you turning up at Accident & Emergency with a brake caliper hanging off the end of your hand due to fingers being trapped! I managed to free my finger by reaching for the small spanner and undoing the bleed nipple to release the pressure!  Anyway, got all four out, haven’t started on the other side of the front brake yet as I want to concentrate on getting the engine started. I’ve worked on the brakes in the garage during the bad, very cold, weather. Need to have the bike outside for starting (attempting to start) due to fumes in the garage which tends to stink the house out. As the sun is shining today I moved the bike to the outside and put fuel in the tank and gave it a whirl. No joy, not even firing so I’ve got some investigating to do. I’m either not getting fuel through or there’s no spark, but I thought I’d already verified I had a spark. Back in the garage I loosened the tank and check the filters. Fuel is there so I presume it’s flowing down to the carbs. Tomorrow I’ll roll it back outside and remove the tank in case there is any spillage. Back into the garage to check if I’m getting a spark at each plug.
29 March 2013
Had a major breakthrough today – Engine has not run for at least 8 years that I know of. Today it did! The past 3 weeks have been making a real go of it with the help of OldSkoolSuzuki.info on Facebook. This evening I was testing for a spark on the plugs and it burst into life on 3 cylinders! Can’t begin to tell you how excited I was! I was taking some video in case anything happened and for the record. Didn’t expect it to fire so it really took me aback. https://www.facebook.com/photo.php?v=507423365985137&set=vb.100001524330891&type=3&theater https://www.facebook.com/photo.php?v=507424219318385&set=vb.100001524330891&type=3&theater Next thing is welding of the frame, stripping and renovating brakes and sorting out the electrics.
30 March 2013
(4th Anniversary of being made redundant!) Had the bike running today and found one of the exhaust outlets is not tight enough and is pushing out exhaust gases to the front. The other three are ok and are getting very hot. The leaking one is cold – Ah, just struck me, is this because that one is not firing! I’ll have to check it in a couple of days after Easter is over with. Got some advice from the OldSkoolSuzuki.info Facebook again. 1 – could be a carb blockage. Put hand inside the Air Filter Box and block the one that is cold. Release and repeat a few time and this might release any blockage. 2 – Remove the plug lead while it’s running and see if it makes a difference. 3 – Check the drain on the bottom of the carb, is there fuel? Could be fuel starvation. https://www.facebook.com/photo.php?v=508086832585457&set=vb.100001524330891&type=3&theater
31 March 2013
Nothing really done today due to it being Easter Sunday and all of the family around for dinner. It’s a poignant day for me as well. My Mother died on Easter Sunday 2011, although it was 24 April I always think of it as Easter Sunday. I did put the bike back in the garage to give more room for parking 
Also need to remove exhausts ready for the welding but must sort the exhaust before removing. Also put it back on the paddock stands ready to start the investigation into why that one exhaust outlet is blowing so much.
06 April 2013 
Over the past week I’ve had the left hand exhaust off to file down the lumpy weldings to get it to fit better. It is better but still blowing so maybe need to take some more off to make it a better fit. It is now getting warm, it was stone cold before and I wondered if there was anything else wrong but I’m hoping it’s just the fitting not being snug enough. I’ve got new copper gaskets in the manifold, maybe use two in each outlet? I’ve also polished the brake caliper pistons. Some pitting but hopeful that it is above the level of the seals! I do a lot of ‘hoping’ with this project!
08 April 2013
How bad can calipers get! Series of photos of the offside front caliper (never know whether to say right or left so probably nearside and offside is easiest!) being cleaned and put back together.

These three show the offside caliper being cleaned by careful scraping and polishing with Autosol. Right hand picture shows the pistons being put back in after replacing the seals. I might very well have to do this again to replace the seals with new ones but I want to get them on and check if they leak first.

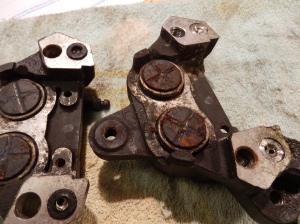
 This second lot of three shows the state of the nearside caliper before dismantling, after splitting and putting the offside one back on the bike.
I’m going to have to reconnect the nearside one to the brake fluid pipe to pump out the pistons as they aren’t going to move looking at that corrosion. I’ll boil them first I think to get them as clean as I can before trying to get them out.
They are obviously in quite a state. Think I’ve got my work cut out with this one. The rear caliper seems to work but I think I’ll strip it anyway and check it out.
11 April 2013
Yesterday I had the expected hell of a job to release the pistons from the nearside caliper.
The corrosion is extensive but the body of the caliper will clean up, not sure about the pitting on the pistons yet. I’m definitely going to replace all of the seals on both sides, the ones on the nearside are so perished and distorted I have no choice really, and to be safe I think I should replace at least some of the pistons. This caliper was boiled, frozen, WD40’d and in the end it came down to brute force with cloth wrapped mole grips waggling the pistons out like a dentist removing a molar! This mean putting the caliper body into the vice but it was also protected with lots of cloth. Evening ;  Requested a price from ‘Scooters and Bikes’ (Cardiff Motorcycles) on ebay for new seals. Might as well get the whole lot for the front calipers and. You can see they are pretty ropey. Some will clean up ok but they’ve already been in boiling water (not boiled but stood in boiling water from the kettle) but the crud has not all dissolved away. Some are quite perished and you can see they are misshapen. I’ll probably not do anything for the next few days until I get new seals, other than cleaning the caliper bodies, scraping at the salt a bit more, toothbrush with autosol, boiling to make sure there’s no rubbish in the channels because there was quite a bit of black bits of rubber in the chambers. There must be bits in the fluid channels that I can’t see.
16 April 2013
After advice from the FB page of Old Skool Suzuki I got a spray can of brake cleaner and find it very good for getting the scale, salt etc. off the inside of the piston chamber. Waiting for piston seals to be delivered so getting the pistons out of the already cleaned  caliper. Couple of nicks in the brake caliper piston cylinders, shouldn’t really use them with this sort of damage but I’m going to try polishing them out as the piston cylinders are quite expensive when I don’t yet know if it’s going to be feasible to get the bike on the road and legal. If I do get this bike on the road and through it’s MOT (Ministry of Transport) test I would then spend the extra money on things like this. Anyway, it’s great fun doing this and learning how it all works and goes back together after taking things apart!
17 April 2013
It’s not often I’m right but I got it wrong again!
 Laid all of the components out ready to rebuild the first caliper. Looking good, I thought, then tried to put the first pressure seal in. It didn’t fit, too big. When I ordered them I said they were 30mm, which is what it looked like when I measured. I’ve never been famed for my measuring skills, many DIY disaster stories about measuring, and this is just another example! Contacted ‘Cardiff Motorcycles’ and they are just great. ‘Pop them in the post back to us and we’ll send you replacements’. I put one each of the old ones in as well so they can see the size, they thought that was a good idea as well!
  So, today I’ve been cutting some square metal to prepare for the welding. Not sure when we will do it, have to talk to my friend Luke, but I am waiting for a decent few days of weather so we can do it outside. Don’t know if this is too thin to use for welding to brace the frame but it should be ok with the gap filled in the frame itself.
 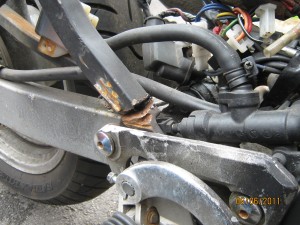 Reminder of what he’s up against –>
20 April 2013
Dropped the bike off the paddock stands and wheeled it outside as it was such a lovely day  today. intention was to start it up and let it run for a while and see if I could identify the blowing problem from the one exhaust pipe. After shopping, baking a cake, lunch, cutting lawns and other gardening jobs it was a bit late by the time I actually rolled it out of the garage and then found the battery just about flat. Too flat to start it so it’s covered up and the battery on charge.


21 April 2013
Uncovered this morning while the meat is cooking and ran the engine for a while checking out the blowing exhaust. I’m sure it’s just the lumpy welding stopping it seating correctly. Glad to say it started first time so things are looking up engine wise. Need carb balancing, tuning etc. of course. Luke is going to bring his angle grinder so I can get rid of the welding down to the level of the flange. Hopefully it will sit correctly then and not blow. You can see the lumps in this photograph -> I thought it might have been this welding that was causing the problem, maybe it wasn’t aligned correctly when the welding of the pipe was done, but it does appear to fit correctly so I’ll just tidy this welding up with the grinder as well.
25 April 2013
Waiting for new seals to arrive so concentrated on the exhaust blowing problem. 
 I’ve filed away the excess welding and it fits much better now. The bolts go all the way in, it looks more snug, but the battery was flat so I’m charging it so I can test it later to make sure the blowing has stopped and all four exhaust pipes get hot. The photos on the right show the excess welding which was preventing proper seating of the exhaust. This has all been trimmed off, enough anyway!
  You can see the flange is much tighter into the manifold than previous photos.
26 April 2013
Ran the engine again after refitting the exhausts. Still blowing but, through the OSS Facebook, I now know that I’m missing 8 semicircular plates which fit onto the flange of the pipes. I may have to do some more filing again but I’ll see when they get delivered. Ordered them from Robinsons Foundry .co.uk. Also received the seals today and fitted just two for now to check the size. Perfect fit and I’ll finish them off soon, refit the front calipers, bleed and test.
27 April 2013
Finished fitting the seals today and refitted the calipers onto the front brake disks. Bled all four bleed nipples and tested with the paddock stand on the front so I could spin the front wheel. Appears to be working really well, stops the wheel and releases. Even made a video! I’d like to get the welding done while I’m going to have the exhausts back off again anyway to fit the plates when they come. Got to figure out how they fit yet!
30 April 2013
Hoping to get the welding done on the Bank Holiday Monday next week so this week I’ll be removing the exhausts again, have to put the plates on when I get them in the post anyway plus it will make it easier to get to some of the bits for welding.
02 May 2013
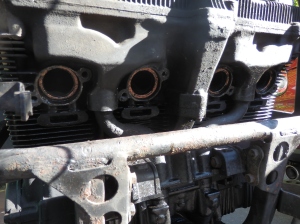
The plates did come in the post yesterday. Removed the exhausts today and had a go at fitting the plates just to make sure I get it right when I put the exhausts back on after the welding. They kept falling out of the engine block so tried some Heldite. I’ll wait until I’m ready to fit them properly! Not shown in the photograph, what you can see is the copper gaskets.
06 May 2013 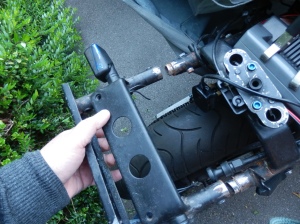
Big day today, although it didn’t get finished we (Royal ‘we’) got started on the welding of the frame. Reason we didn’t finish was the tip broke off the end of the welding gun but my friend Luke has taken it home to see if his dad has any good tips about how to get the broken one out. Also got rid of that useless bit of metal plate on the back which had been welded on to fit an LED light array.
 It was preventing me from fitting the standard subframe assembly.
  So when the welding is all done I can fit that and get going on the electrics. Photo on the left is the angle grinder being used to prepare the worst part of the frame for welding. On the right cutting off the back plate and tidying up the stumps that are left. This was the plate before starting to cut it off.
 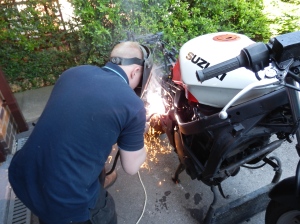 Luke filling the big gap with weld. I will now prepare plates for him to weld onto the frame to strengthen the welding done today.
10 May 2013
Last couple of days have been awful weather-wise but done some preparation for further welding. Made plates and cleaned off around where the welding is going to be done. This is what the rear looks like with the plate removed. 

 Offside welding filled and cleaned up. May do a bit more filling to avoid wet finding it’s way in there, don’t want it falling apart due to rust in a year or two! Nearside plates made, welding fill to be done first and then the plates welded on for strength. Offside plate made, again for added strength as this side has already been filled.
11 May 2013
Got myself an angle grinder the other day, what a great tool, wish I’d got one years ago. As the weather is still awful I just ground away the excess welding lumps on the exhausts so hopefully they will fit better when I put them back on after the frame welding.
16 May 2013
Sorry, it’s been a bit quiet lately, not been able to finish the welding due to the atrocious weather but I did get some stuff delivered this week. Red rubber caps for the brake bleed nipples (wonder if I can use them as wheel dust caps, have to look at that as I have a couple of spare ones!). A box of nuts, bolts, washers and locking nuts. The lack of bolts has prevented me from fitting a lot of things to the bike, subframe, headlight and instrument cluster etc. Put the headlight/instrument cluster on today but just tinkering really, I want to finish the frame before getting stuck into the electrics. 17 May 2013 Still no welding this weekend so had a fiddle with the electrics. Put the front assembly on  with the headlight and instrument cluster. Headlight works but not sure about the rest of it yet. I just stuck the plugs into obvious sockets, most of them are pretty obvious and won’t fit anywhere else. The right turn indicator appears to work but when moved over to the left indicator the right one stays on and goes dim (indicator lights on the panel that is, no indicators fitted).
  So, I need to fit indicators and check if the ground is ok. Got a black and white wiring diagram but hope to get a colour one from ‘my usual source’! That would be Simon ‘Frankie Walney’ Evans 🙂 The loom appears to be a bit of a mess with lashings of electrical tape, maybe that’s normal I just don’t know but I’m going to strip it back a bit at least so that I can see
  the colours. Some are cut off, particularly on the rear end of the bike but can’t do much there until the welding is done and I get the subframe fitted.
02 June 2013
Waiting to complete the welding but Luke has been very busy with exams and patio laying. Today I checked out the rear wiring and managed to figure out, I think, which wires go where. I also found that I’m missing a connector block but I think I can get around that quite easily. If I can solder the correct wires into the sockets of the block on the light than I should get away with it. Probably check I’ve got them in the right place first by just sticking them in and seeing what happens first before I secure them! I’ll have a look and see if I can find the correct block though, it would be nice to get it right. I’ve put labels on the various wires in groups i.e. Green & Black/White to the rear left indicator, Black & Black/White to the rear right indicator etc.
22 June 2013
I don’t think I’m going to see Luke’s Dad’s MIG welder back again so I’ve asked Mike, across the road, if his bloke at work can give me a call and arrange a suitable time for him to come and finish it off. Luke made a good start with filling that large gap on the nearside of the frame. That needs finishing off with welding of plates to ensure it is secure, offside gap and plates and the 4 joints at the top, back end, of the frame need welding but not filling so shouldn’t be too big a problem. When that is done I’ll put it back in the garage to sort out the electrics, after putting the exhuasts back on and running it for a while.
10 July 2013 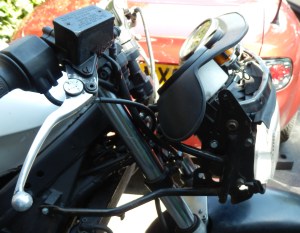
A friend at the school (when I drop the grandchildren off) has a biking husband who has a welder and I’m hoping to borrow that in a week or so. The cluster that came with the headlight has some marks on it so I swapped it with the one I got off ebay 4 years back as it is in lovely condition (the black plastic is anyway!). 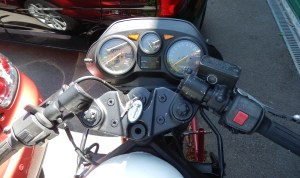 With this in mind I was heartened to put the front end on with the instrument cluster and light. After determining what the various wires were, and labelling them, I put the frame on and wired up the instrument cluster before bolting it all in place. Haven’t tested as I’ve got the battery off ready to finish the welding.
01 August 2013
Not a good day. I still haven’t got the welding done, thinking of buying a small welder for about £60.00 but I know I won’t use it again so must be patient. So, today I wired up the rear indicators and rear/brake light and put the battery on to test. The indicator turn lights work on the instrument panel, the red oil light is on, and the Neutral light is showing. Other than that nothing works. The headlight does not come on, although it did before, and the engine doesn’t turn over. I didn’t expect it to start as I don’t have the exhausts on but I did expect it to turn over. I do think its the wiring so I need to undo what I’ve done and go back to what I had when the engine was running.
08 August 2013
Well, over the past couple of days I’ve been doing some testing after dismantling the rear wiring. I found that even after charging the battery overnight the engine didn’t turn over. I decided to test to make sure the engine had not seized. Being me I undid the wrong cover, gearbox instead of the crank case cover. Result was a load of oil all over the drive although I did catch a lot of it in a handy tin! (I didn’t re-use it!). So when I removed the crank case cover and turned the crank using the big nut I found the engine is nice and free. I then noticed the oil light was illuminated and when I pressed the starter switch it went out. Ah, I though, must be the battery. I charged the battery, on the bike without disconnecting it, for a couple of hours and it then turned the engine about 5 times before dying. I need a new battery!
21 August 2013
Looking good for welding this weekend, weather permitting. I got a bottle of Co2/Argon gas for Luke’s Dad’s MIG welder and Luke got the regulator  today. I didn’t realise they didn’t have one or I would have got it at the same time/place as I got the bottle. I can highly recommend ‘Noz-All’ in Knightsbridge village, near Cheltenham. Very helpful, friendly and even better they were the cheapest around! I’ll be busy on Saturday and BH Monday at the opening of the Jet Age Museum but Luke is coming on Sunday to do the welding for me.
25 August 2013
Luke came today to do the welding which was carried out with his usual thoroughness and perfection. Now 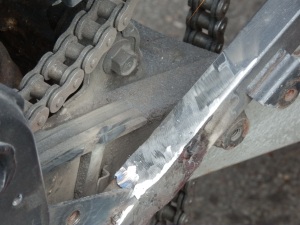 that the frame has been made good I can paint the welds, get the exhausts, hangers, rearbrake pedal, etc. refitted and sort out the electrics. I feel so relieved to have the frame done, it’s been quite a stumbling block and pointless doing much else until that was completed.
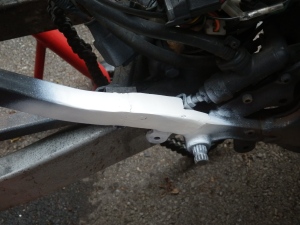
 Above is the welding done and tidied. to the left the primer has been applied and I need to get some black spray paint to finish it off. Offside view of the completed frame.
  We connected the battery that I took off the Rover 25 and tested that the engine turned, lights worked etc. All ok so it is the bike battery that needs replacing. (We scrapped the Rover a week ago due to the cost of replacing the engine – it’s a long story!).
27 August 2013
Managed to do a little painting of the white  primer paint on the welded parts today despite it being an incredibly busy day with allotment, shopping and nephews birthday gathering.
 Rear shot from the rear. Touched up more than the welds as it was all looking a bit tatty here due to having to cut the rear panel off that had been welded on for an ad-hoc LED light array. Shot of the rear from the front. Two welds
 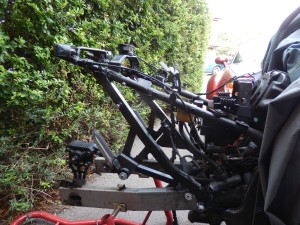 between the seat lock mechanism and the indicator lights. Very difficult to weld and finish off. This is the paint I used simply because I already had it in the garage. It’s for metal, it’s satin, it’s black and it mostly won’t be seen anyway!
30 August 2013
I think I may have some wiring wrong. I put the subframe on the rear today and wired up the rear lights and indicators. Number plate light works fine but the rear light only works when I put the right indicator on, it flashes! Some work to do there, have to study the wiring diagram again. The bulbs in the rear indicators are both blown and although the indicator housings are the same the bulbs are different and the fitting inside the housings are different! Here I come e-bay!
01 September 2013
In between doing the Sunday dinner I managed to get some work on the bike done as well because dinner was being served later than normal today. 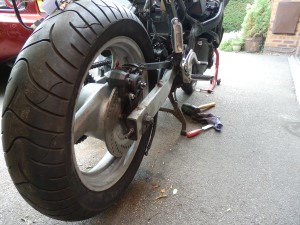 First thing was to get the rear wheel on, which I did but it’s not easy. There must be a knack/technique to this that I don’t know about but it was much easier once I took the paddock stand away and left it on the centre stand. Still got the brake pipe to fit and bleed and then test to make sure it is ok. I haven’t stripped the rear caliper but I’m going to see how the rest of it goes first i.e. make sure it runs and gears etc. are all ok.
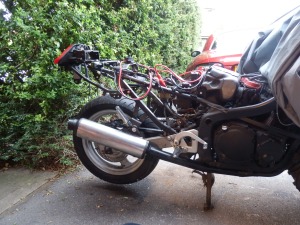
 After dinner, around 5’ish, managed to get a lot done. Hangers on both sides, brake pedal and exhausts all fitted. Had a little problem when fitting the nearside hanger. As there was a gap in the frame, where it was hacked off, it was a bit dodgy fitting the hanger last time I did it. Now that the welding is done I found that the holes are out slightly, probably no more than 1/8 inch but it makes a difference when you are dealing with bolts the size of the ones used on the hangers. I did manage to get the rear one in by leaving the front two loose on just a turn of the thread. Tightened them all up bit by bit and there is a slight angle on the top two bolts but it’s barely noticeable. Not sure if this will matter when it comes to getting it checked out for an MOT. I haven’t tightened the exhaust manifold bolts right up yet but that is the next job, then fit the rear brake and pipe.
02 September 2013
Fitted the tank, had to consult my notes to remember which pipes were which! Took a lot 
 of turning over but started after I turned the fuel tap to ‘Prime’ as there was no fuel flowing down to the filters. Running at very high revs (3,000), might be to do with the choke which I need to reroute as the wire is sticking out at the side a bit. It did settle down to 750/1000rpm after a while but the fuel stops after a few minutes so could be a problem with the carbs diaphragm as well. Exhaust is still blowing but found there is a hole where the top part of the offside pipe is welded on. I’ve bunged that up with exhaust repair metal tape. Still blowing from the top a bit but I think I’m going to have to get some liquid gasket, take it off and bung it up.
12 September 2013
Today I sorted out the rear end lights. As we’ve had a bit of rain lately I put the bike in the garage, just managed to fit it in because as it’s been outside stuff has started to pile up again! As above, the rear light was flashing when I put the right hand indicator on so I suspected I had a wire crossed somewhere, call it intuition but I just had the feeling. I fitted the new indicators I got off ebay and wired them up. I removed one suspect wire from the rear light cluster connector and stuck it into the right hand indicator and switched on. Lo and behold it worked. I now have the rear brake pedal fitted and tried that, it worked. and the lights, they worked – rear, high and low beam a the front, instrument cluster illumination, indicator lights on the instrument panel, oil and neutral light, all working. I’m not sure if there’s a ‘sidelight’ in the headlight, if there is that isn’t working but I’ll investigate.
15 September 2013
Recieved the speedo cable from Wemoto.com yesterday, might get a chance to fit it  tomorrow although can’t test it yet until I get the bike moving. I suppose it would move now but haven’t refitted the rear brake caliper yet and still some electrics to sort out before I can run through a sequence of checking items for MOT and running on the road. The rear electrics are sorted, but not tidy! at the front I cannot find the wires for the indicators or the parking light in the headlight assembly. There’s certainly no bulb holder but can’t even find wires. I suspect that it might have been cut off when the bloke before me cut the bike up to make a streetfighter because he had cut the rear loom to fit different lighting kit. But why the indicator wires? Maybe I just haven’t found them. Have to have the fuel tank off again to look properly.
17 September 2013
After yet more advice, and criticism from some, on Old Skool Suzuki I had a go at fitting the speedo cable. Top end behind the speedometer was straightforward but cannot get the bottom part pushed into the hole at the bottom of the front fork.
  Is it just me, getting the rod into the hole or is the hole a different size to the connector? Don’t think so because the first part of the alloy connector is going in, just not getting all the way in. I’ve presume the rubber washer goes where I’ve put it, on the second groove, to stop dirt going into the hole. In the meantime I’ve refitted the rear brake, bled it and tested, on the stand. All seems to
 work including brake light! Also changed the exhaust rear bolt fitting. Exhausts seemed to be too splayed out so pushed the flange to the inside of the frame. Don’t know if it’s right but looks bettter.
19 September 2013
Thanks to advice from Old Skool Suzuki and Wemoto getting back to me I managed to do the speedo cable. The speedo assembly in the photograph above is about 45 degrees out of alignment so you couldn’t even see the little bolt that secures the cable. The photo on the left is the correct positioning. Loosened off the axle bolt and you can spin the speedo assy to the correct position, see the bolt, loosen it and stick the cable in and tighten up the bolt. Easy, when you know how! Next, figure out the front indicators and the sidelight, which doesn’t seem to have a bulb holder or any wiring for it!
22 September 2013
Been searching the interwebnetthingy and cannot find a bulbholder for the sidelight. Can’t figure out where to connect the wires for it either as there does not appear to be any spare wires hanging around. Have to ask on the OSS I think.
24 September 2013
Simon came up trumps again. He’s found a sidelight bulb, holder and attached wires in his ‘box of bits’ and is going to send it to me. I’ve said it before and most likely will again, the Old Skool Suzuki has been my saviour so many times, everyone has been great but Simon is just brilliant and got me out of so many holes. Andre Lawson also gave me some excellent guidance in which wires to connect the sidelight to. Great guys.
03 October 2013
Two bits of good news today, got my Old Skool Suzuki Multi Pack 1 with a couple of keyrings, couple of stickers and patch. The other is I’ve now got the front indicators going so the only thing, that I know of, to do
 electrically is the sidelight in the headlight assembly. I am going to undo what I’ve done today though as I realised that if I need to remove the instrument cluster I’ve soldered the indicator wires on the wrong side of the connectors so wouldn’t be able to lift it off! As Marlane always says, ‘If a jobs worth doing it’s worth doing twice’ !!!!
O4 October 2013
I now have a sidelight, high and low main headight, indicators front and back, instrument  panel illumination, horn, rear light, brake light (operated by front and rear brake operation), number plate light. Looking pretty good. Still not getting a reading on the fuel gauge but I think I don’t have enough fuel in the tank to register, hopefully that is the problem. Then realised I don’t have the fuel sender connected – DOH!
21 October 2013
It’s been a hectic couple of weeks with an RAF Masirah and RAF Salalah reunion in Harrogate over one weekend, Julia back and forth and now off to Afghanistan a few days ago. Now preparing for landing, stairs, sitting and dining room re-carpeting and all that goes with it! Did have a look at the back end this morning. Although there a few bits that need to be  sorted mechanically I am hoping a friends husband will be able to take a look and advise me next Sunday. Put on the rear bit of fairing that goes over the rear light and the grab handle. I’ll have to take them off as I’ve realised the same bolts will be used for the side ‘GSX750F’ side fairing which runs along underneath the saddle but it’s a learning experience. Also realised that I had the rear indicators in the wrong place, they need to go further down from where I had them.
24 October 2013
Had some time today while the carpet fitter was doing the sitting room dining room, stairs and landing! I messed about and figured out how to fit the rear mudguard, side rear fairing together with the grab handle and bit of fairing over the rear light. Because I made a mistake with the location of the rear indicators I drilled out one of the holes with the thread for bolts to hold the grab handle and small bit of fairing! I have a kit of bolts though and I can get a bolt on the inside with a washer etc. The rear hole is still ok with the thread. Sometimes I just despair of myself!
26 October 2013
Put the fairing on the sides and rear after figuring it all out a couple of days ago. Doesn’t  look too bad but doesn’t look right! I don’t suppose this is really a problem but I’d like to see if I can figure out why. I did find the seat release lock had been moved down and screwed into the frame with one small bolt. I realised this was incorrect when the hole on the nearside rear fairing would not fit because there is a hole for the lock to fit into. I moved it back to where it should be, which had been cut off with the ‘streetfighter’ mod that didn’t happen with the previous owner. It is now in the correct position with two bolts which makes me think it must be the seat causing the problem with the non-flush fitting.
28 October 2013
Most days I don’t get much time, if any, to look at the bike but managed a few minutes this evening after painting our daughters bedroom ready for visitors and for when she comes back from Afghanistan in the new year for her R&R break.  I found a lump of metal underneath the seat locking assy plus some rubber blocks taped to the frame with electrical tape. Took them all off, left the rubber blocks at the front as they look like they should be there but contemplating removing them as well as it is better but still a bit high at the tank end, and the back end come to that! I’ll have to look again when I’ve more time to fiddle around.
01 November 2013
YES! Cracked it – Thanks to all of the advice from OldSkoolSuzuki on Facebook I knew everything was correct so it must be something I was doing/not doing. After sorting out the ‘lump’ at the front of the seat, didn’t realise this fitted underneath the tank mounting, I noticed that the white plastic bits at the rear were shaped as if they should be fitting onto something. Andre Lawson, on FB, mentioned the two prongs above the light mount/subframe and they almost lined up with those so with a little bit of a push they snapped into place and Voila
  (That’s yer actual French). Thanks again, I’ve said it before and it won’t be the last time – Where would I be without The OSS blokes. When I get this thing on the road I’m going to have to do a nationwide tour to say thank you to everyone. I’ve also noticed, on ebay, that the bolts holding the grab handle and top bit of fairing are allen bolts. Makes sense as normal bolts are hellish to tighten up. I’m going to use my thin cutting blade on the angle grinder to cut screwdriver slots in the normal bolts.
05 November 2013
Did that, the slots, and managed to get the bolts in all the way on the rear fairing.
 Also, after advice from OSS on Facebook, I connected a tube from the stub on the side of the carbs, that I didn’t know about, to the vacuum connection on the fuel tap. This had the result of the engine running for 10 minutes instead of 4 but it did still stop so there’s still a problem. Posted this result on facebook and Andre Lawson came back up suggesting that I disconnect the pipe from the tank end and blow/suck which should tell me if the diaphragm is working or not. Bike is now outside and the forecast for tomorrow is dreadful so I’ll try when the weather is better. I don’t like to do anything concerning fuel in the garage because of the smell going throughout the house.
12 November 2013
Because I’ve bought cheap indicators off ebay the front ones aren’t long enough to stick out of the fairing. I’m trying some square tubing with a bolt forced into the end, soldered (I haven’t got the welder) and I’ll use that epoxy steel stuff to fill it in. Soldering bolts and tubing is not easy but I have a small gas blowlamp that heated both up considerably and the solder flowed very easily, with no flame on it, around the bolt. I can’t fill the gaps though as the solder that has held would melt while I was trying fill them. Next is to get the front indicators back off the bike to see what I can do at the other end. I need to extend them by about 4 inches I guess. I’ll put one side fairing on to check that though before I cut the square tubing.
15 November 2013
Stop press — and stop buggering about with bits of square tubing. Through the ‘Practical Sportsbikes Magazine’ facebook page I got in touch with Brian French, after being pointed to his post by my mentor Simon. Brian was giving away stuff from a GSX750FK that he’d recently bought to modify. I am 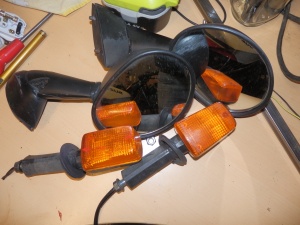 after a screen and the bits of fairing to cover the headlight/instrument panel. I drove up to Lichfield today and came back with side fairings, screen, front indicators and mirrors. Brilliant, and always amazed at the generosity of the biking fraternity. Anything I don’t use I will be passing on for free to keep that spirit going. Don’t know if you’ll see this Brian but thanks once again.
28 November 2013
Not had any time to play recently but today started to investigate some of the outstanding electrical things before bolting the fairing on. I removed the current rear fairing panels so I could access the wiring areas that I need to look at. At least I now know where they fit etc. 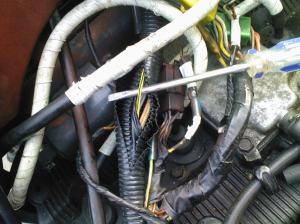 The fuel gauge is one major item and I’ve found a black and yellow wire but had to cut open the loom above the engine rather than down underneath the battery holder where I expected to find it. Can’t find any connectors, or correct coloured wiring, down there. I intend to bare this wire, solder a spur onto it with a push connector and then pick up an earth wire from somewhere for the other wire to the gauge.
  While I was looking down below I found another wire that is not connected to anything. It’s a red wire with a female push connector. I asked on the OSS facebook page and got some advice as follows; Andre Lawson Sussed it, that’s the reset switch, its like a trip switch in your fuse box at home, major electrical surge trips it out, push button in centre to reset, does show it in the wiring diagram, can’t think what it’s called though, will be linked to main fuse somewhere along the line though! Andre Lawson I think that it picks up the feed from the alternator, which is a red or an orangey red, when you connect those wires into the loom don’t get them mixed up, if connected the wrong way round it will leave the ignition live and kill the battery (voice of experience) when the cloth sleeves get dirty they both look the same colour, browny red, mind you if the alternator has the two pin plug still attached it it shouldn’t be a problem, not sure that the wire you have left doesn’t go to power up fuse box? I also soldered the ends of the wires on the front indicators I got from Brian French and soldered push connectors onto them ready for installation when ready to fit the fairings. Did the same with the purchased indicators that I removed from the front and I’m thinking I’ll fit these to the rear so I’ve got two indicators each side on the rear. They are ok but quite small. Maybe I’ll just cut the loss and get some original rear indicators so they match the front. Decisions, Decisions, my mind is spinning!
02 December 2013
Very cold in the garage but been doing some bits and pieces, mostly soldering connectors onto the end of wires. Got the fuel gauge working this afternoon, tested the front indicators that I got from Brian French along with the fairings. 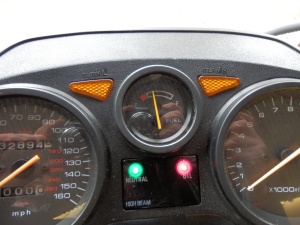 I couldn’t find the yellow/black down where it was supposed to be so I soldered a spur onto the y/b wire in the photo above and put a push connector onto it to connect it to the cable on the fuel sender. For the negative connection I extended the wire down to where it should be as the neg connector is there under the battery box. Still to sort out that red cable.
19 January 2014
Happy New Year, bit late but it’s been a busy few weeks since last posting. Haven’t been totally idle but not done a lot. Put on the offside fairing and front indicator. Brian French is going to send me the little bit that goes beneath the headlight and I hope he can send the rear indicators as well so they are original. So, the indicators are working but the fuel gauge, after the euphoria of seeing it work, stopped working and I have not been able to find the time to study it yet to figure it out, or that red cable!
18 February 2014
Been very cold in the garage during the first month and a half of this year and also been

 quite busy with one thing or another. Today I managed to find some time. Got the fuel gauge working again and started putting the rest of the fairing on, including indicators, mirrors, fairing windscreen. Well, not quite. Got a real problem fitting the nearside fairing and mirror. Not sure why but had a hell of a job lining up the fairing but managed to get it secure in the end. Looks like a mirror bolt is sheared off, top one of the two on the nearside. Means I’m going to have to take the fairing off again so I can drill it out to see if I can unscrew what is left in there. When we get some dry weather I also want to get the bike outside to test the running with the petrol cap loose to see if it continues over the current 10 minute duration. Someone said that one of the more stupid things is the breather hole in the cap being blocked. I can’t find one so that may be it! Due to the difficulty in fitting the mirror the screen is not quite aligned. I haven’t got a lot of room so it would be good to get it outside to work on again.
20 February 2014
I think I’m seeing light at the end of the tunnel. Further to the above update I removed the nearside fairing and found the sheared off bolt wasn’t that at all, it was just a bolt screwed into the hole. Replaced the fairing, managed to fit the mirror, indicator and screen although the screen is held on with odd bolts at the moment. A guy in Kilmarnock is sending me the bit of fairing that fits underneath the headlight, and possibly the rear indicators as well. The bit of fairing should pull the sides in to make the screen fit better. Other bits to do are; Fit the tax disc holder Refit the DID chain cover Fit the underneath cowling Sort out the fuel feed problem. With the usual advise from the OSS facebook group I’ve dismantled the petrol cap cover, blasted it all with carb cleaner to clear the breather hole. I’m hoping that is all that is preventing the fuel flow and it’s causing a vacuum so the fuel can’t be sucked down to the carbs. Hoping it’s fine tomorrow so I can get it outside and run the engine again.
21 February 2014
The sun is shining, the dogs have been walked, lets see how the bike goes. I’ll try it on a stand first, I’ve seen too many ‘You’ve been framed’ videos of bikes shooting off crashing into fences and hedges! I want to make sure the clutch and gearbox work ok, I have done it before, on the stand, so it’ll just be to check things out before trying it on the hard tarmac! Evening – It’s been tipping it down and sunshine so not much done. However, I did manage to get it outside, onto the paddock stands and started the engine after a few minutes of trying. It ran fine on ‘Prime’ tank tap setting but when put to ‘On’ it stopped after 10 minutes again. I was going to loosen the tank filler cap and try again but it started to pour down so covered it up and then there were jobs in the house to do. Saturdays I’m at the the Jet Age Museum so it’ll probably be Monday before I get the chance to do anything again. While the engine was running I sat on the bike and selected first gear. Just as I feared the rear wheel started spinning. Not sure if this means the clutch is worn and on it’s way out or just needs adjusting. I adjusted the cable at the hand lever end and it now works ok although the thread on the adjuster is fully out. I’ll look into the manual to see if there are other areas of adjustment.
24 February 2014 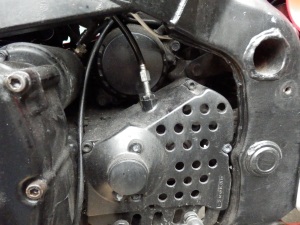
Another successful day. With advice from OSS Blokes I adjusted the clutch cable so the hand lever is no longer floppy and the wheel does not turn with the clutch ‘disengaged’, which was not the case yesterday! Cleaned up around that area as it’s not looking very tidy but if I can get it MOT’d I’ll do a lot more cleaning, repair and spraying of fairings, mirrors etc. Through OSS FB page I thanked Simon for the rubber diaphragm he sent me in the post. With cleaning the filler cap and fitting the rubber it may have made the difference in the engine running below. His advice and help is very much appreciated as always. Today I are mostly been doing; Taking off the nearside fairing, mirrors etc. Adjusting the clutch cable, successfully! Tightening bolts on the oil filled rad, checking other bolts for tightness and adjusted the gear change lever as it was a bit loose. Cleaning up prior to putting the fairing back on (not put it on yet)  But the biggest thing was lifting the tank to check for pinched tubes etc. I did find one of the breather tubes (very close to the fuel tubes on the carbs) had come adrift so managed to refit it. Not easy, the tube I’m using is about the same bore as the breather tube, and the breather tube being floppy makes it difficult. I could make a comparison but I’d probably get banned! I inserted a smaller tube into both to secure them together. Nothing seemed to be pinched so gave it a whirl. Fuel tap on ‘Prime’, started immediately and turned it to ‘On’. The engine ran for over 20 minutes before I switched it off as I had to get ready to pick up the grandchildren from school. That is quite a breakthrough, the longest it’s run before is 10 minutes and it cut out due to fuel starvation so stopping it myself is unusual!
 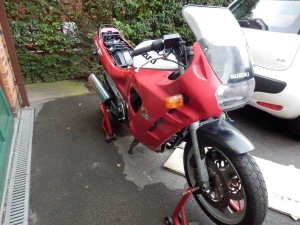 Hope to do checking of various bits tomorrow, weather permitting, and plan to test it running on the road (very locally of course as it’s not MOT’d etc. yet).
25 February 2014
Trying to do stuff today but have to keep rushing for the cover because of the very heavy showers we keep getting in between the glorious sunshine. Managed to get the nearside fairing on and received the bit for underneath the headlight from Brian French, the chap I went up to Litchfield to get the screen from. So it’s looking good with the mirrors on, all of the fairing, got to put the front nearside indicator on and also the rear indicators when I receive them from another OSS bloke, Darren in Kilmarnock, to replace the cheap ebay ones. I’ve found that some of the bolt holes for the fairings are missing, no idea why that should be, With one of them I’ve bolted the side fairing to the rear fairing but not to the frame. Need to source the bolts for the screen. Some cracks in the fairing which I’ll sort when it’s MOT’d. I’ll have to fibre glass, rub down and spray all of the front fairings, the rear ones are in very good condition.
26 February 2014
Red letter day today – Rode the bike along our close, not out onto the main roads 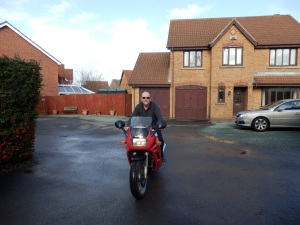 obviously as no tax, insurance, MOT! It’s only a bit short of 100 yards but it seemed to ride ok, gears (1st and 2nd) were ok, not enough length to go any higher. All the lights work but expecting some rear original indicators in the post to replace the e-bay indicators on the rear.
 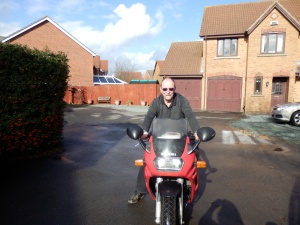 Brakes work, but only just realised I did not strip the caliper on the rear like I did the front two. There’s only one on the rear so it shouldn’t be too difficult if I need to. All in all very happy with today and very chuffed 🙂 Enough for the MOT I hope.
27 February 2014
Today I fitted the ‘DID’ chain guard, bottom fairing (underneath to protect the sump,  road tax disc holder and realised that yesterday I didn’t check if the speedo worked. Took it down the close and back again and it got up to 15 mph so it does work. I presume it’s accurate. Went down to Mantra Motorcycles this afternoon to explain why I haven’t got an MOT history and the bloke seemed really nice and helpful. I’d popped in about a year ago to snoop around and decided I’d like to support a local small mechanic and that’s why I went there today. It’s right next to the Kingsholm rugby stadium. Aidey, the m/c bloke, said the best thing is to bring it straight in to an MOT and that will find if there’s any problems and we can take it from there. So it’s booked in for next Tuesday, 04 March 2014 – a monumental day (but it might not be all over yet of course!).
01 March 2014
All day at the Jet Age Museum so after something to eat I just nipped out to check fluid levels, brake and oil look fine and no diminished levels since I last checked. Also had a go at the throttle cable adjustment and did manage to take up some of the slack, feels much better now. Before Tuesday, MOT day, I just want to go over it checking light level and changing the rear indicators if they arrive in time.
02 & 03 March 2014
Checked out a couple of bits Sunday morning and more today in preparation for tomorrows MOT. The heavy front end and a bit difficult to steer turned out to be low pressure in the front tyre. I’ll check it again tomorrow to make sure it’s not a slow puncture. The tyres are the same as when I picked up the bike in 2009, last time the bike was used was Jan 2007, probably sooner but that’s the expiry of the tax disk on it. Altered the idle speed, span the rear wheel and doesn’t seem to be rubbing and the brake works fine. Checked all of the lights, the flash to pass doesn’t work but I wouldn’t think that’s part of the MOT test. Horn, fuel gauge, speedo, indicators etc. all ok. Starts first time, just a little choke needed but that was before I reduced the idle speed. It was revving at around 2500, got it down to just over 1000. Fingers crossed! If anything fails it may be emissions as I haven’t had the carbs balanced.
04 March 2014 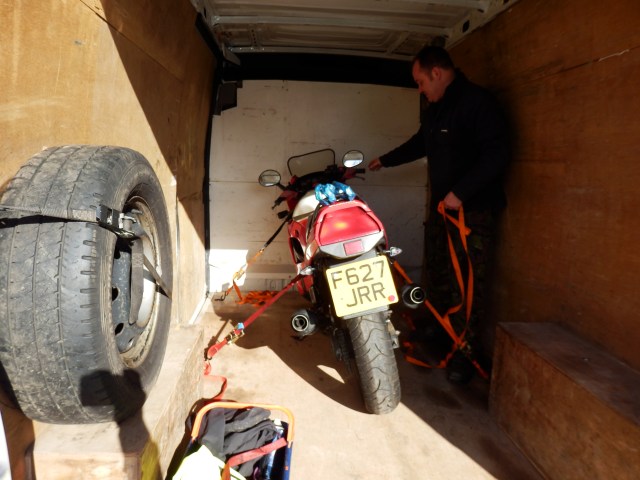
It’s gone and I should find out tomorrow what the result is. I told Ady, of Mantra M/Cycles, that the only thing not working that I know of is the ‘Flash to Pass’ button. He said that it is a fail in itself, if it’s fitted it should work. He also said that it’s probably just muck or corrosion inside the switch and should be easy to fix. I hope he’s right, and I hope he does it for me!
05 March 2014
It could have been worse, Front brake calliper spewed brake fluid when put under test. Better to find out now than when I’m going into a roundabout! Rear shock absorber bounces when it comes back up. I’ve ordered a new shock off ebay so that should come in a few days. Ady said he will source the seals necessary for the front calliper. There is also the flash to pass switch but I think he’s going to sort that when he’s doing the other work. Could have been a lot worse but now I can see the light at the end of the tunnel that has been such a huge learning curve about how motorbikes work. I’ll update again when it is retested.
06 March 2014
Popped into Mantra Motorcycles to pay for the transport and MOT, a very reasonable £45.00. Just waiting for delivery of the rear shock absorber now, estimated to be next Wednesday but hopefully sooner as it’s been marked as despatched. Ady showed me a photo of the brake fluid on the floor, it squirted out all over the disc and then sprayed in a line along the floor.
07 March 2014
Despite it being my wife’s birthday I still had the opportunity to pop into Mantra Motorcycles to drop off the rear suspension shock absorber that arrived today. When I got it off ebay I paid for standard delivery so wasn’t expecting it until next Wednesday, 12 March. When I told the seller that I would go in and ‘Buy it Now’, after he’d answered my question about it being suitable for a GSX750FK, he sent it next day delivery. Some guys on there really make up for the rubbish sellers. Hoping the seals will be delivered Monday/Tuesday so should be on the road by Wednesday.
15 March 2014
Was hoping to pick the bike up yesterday but the front calliper was giving trouble. After receiving the seals Ady fitted but when tested they still had a slight leak. He split the caliper again and rechecked and found gouges in the piston, possibly caused by mole grips (Wonder which idiot would use mole grips on difficult to get out piston!!!). Anyway, he did some magic and got that sorted but it means the rear suspension will be done this morning and hopefully I should be able to pick it up later on today. He has also sorted the Flash to Pass switch, turned out to be what he expected with corrosion around the contacts.
15 March 2014 – continued Pasted from my facebook post in OldSkoolSuzuki; OK, Good news and bad news. Bad news 1 is that there was more wrong than initially thought. Some idiot (read my blog and you’ll find out which idiot) had tried to get the pistons out of the caliper with mole grips. The idiot did wrap cloth around them but still left little gouges which was allowing fluid to squeeze through. Luckily Ady, at Mantra Motorcycles, was able to sort it. Bad news 2 is that the rear suspension was from a later model, set with hydraulics, not cable. Ady also sorted that but with cable ties, need bigger jubilee clips than he has available but it’s well located under the seat. I can sort that when I get it home. GOOD NEWS is that the bike has passed the MOT ! YAYYYY. He worked beyond his normal Saturday working hours as he had to remove ALL of the fairings to fit the different suspension shocker. The bloke on Ebay said it should be ok, and it is, just not authentic 1989 model and I didn’t know any different. So all in all it’s a good result and if I find there’s something I can’t handle in the future I know where I’m going – http://www.mantramotorcycles.co.uk/ in Gloucester. (next to Kingsholm Rugby stadium) ***************************************************************************** So – is this the end? Oh No, I’ve got more maintenance work and also cosmetic work to do. I want to smarten up the cracked side fairings, get a new screen, clean up the wheels, swing arm etc. and repaint, get the tank sprayed and maybe put some transfers on the fairing ‘SUZUKI’ and the like. Also need to strip the rear caliper off to clean up and maybe put new pads in although they passed the MOT they do need an ‘essential winter brake caliper service‘ as in DelBoy’s garage on YouTube. Picking it up Monday morning around 1030’ish and riding for the first time, other than up and down the close!
19 March 2014
Can’t believe I didn’t give a report on Monday after picking up the bike. As you know, I haven’t ridden a bike since 1998 and that was a 250cc. This was quite different and not made any easier by the clutch needing adjusting. I could have asked Ady to do it but I wanted to finish the bike off myself with the little bits and pieces. As it happens I got home safe although I stalled a few times on the way because the clutch was engaging with hardly any movement at all so when I stopped I had the brakes on but it was trying to move so stalled. Quite embarrassing but nothing more! Had a go at the clutch today but Simon is right, it must be so stretched so I’ve ordered a new one from Wemoto. When it arrives I’ll fit and adjust it. By then the tax disc should be here and away I go! 20 March 2014 Today I removed the nearside fairing to prepare for the new clutch cable. Why oh why is there always a problem!  One of the allen bolts is rounded and if it’s as tight as the other ones were I haven’t a hope in hell of moving it. Tried a screwdriver that jammed quite nicely into the allen key hole but couldn’t shift it. Tried to adjust the clutch so I could ride it down to Mantra Motorcycles but impossible to adjust it so the wheel is free with the clutch disengaged. That is obviously the reason I kept stalling on the way back from the MOT, engine was still trying to push me forward when I came to a stop. Left the side fairing off, put the indicator and mirror back on and will ask for advice from the OSS blokes on FB. Hope I can do it myself, if I can free up that bolt. 21 March 2014 Very quickly after asking for advice I managed to get the bolt free using a Torx bit, luckily I had these in the garage already. The rounded Allen key hole was in between Torx bit sizes so I drilled and hammered a bit into the hold. It then turned very easily with mole grips. Haven’t had time to go further yet, had to spend time at the Jet Age museum and jobs at home so hope to do this on Monday. The clutch cable arrived this morning.
23 March 2014
Changed the clutch cable today and had a problem with losing Neutral! Had the bike on the 
 centre stand and tried selecting gears while adjusting the cable but couldn’t get it back into neutral. Simon advised taking it off the stand to rock it back and forth. That worked but still got a problem with the clutch not disengaging. Tomorrow, if I find the time, I’ll do some more adjustment to the Release Mechanism. It’s behind a rubber grommet on the crank case cover, where the clutch cable goes into. There’s a couple of people mentioned this so hoping that it will resolve the current ‘Challenge’! As you can see, it’s pretty grotty inside the casing. I did scrape some of this out, cleaned and greased spindles, chain, bolts etc but when it’s all running well I’ll start a proper campaign of cleaning end to end.
24 March 2014
Had another go at adjusting the clutch today but also did the Release Mechanism adjuster screw. Didn’t make any difference so I think I’m going to have to strip the clutch mechanism. Had some advice that if I do it on the side stand I might get away without draining the oil.
25 March 2014
I think I’ve cracked the clutch, resolved I should say rather than cracked! A little turn there, adjust the worm, another little turn here, adjust the worm…… etc. etc…….. Started by screwing the handlebar clutch lever completely in and then down to the cable adjustment at the sprocket cover end. Took the grommet cover off the worm screw adjuster and then took nearly half an hour to go from the bottom cable adjustment almost completely unwound to it being complete zero thread showing and back to just a little thread with adjusting the worm screw EVERY time. Seems to have done the trick, at least it’s rolling back and forth on the drive but can’t take it for a run to check it out totally as I’m off to Blood Donation place now, and it’s raining and I need to at least put the bottom bit of fairing back on (what’s it called? the belly fairing, the under fairing, who knows!). Thanks a lot, again, to everyone for the advice. I hope I can actually go somewhere on this bike now, it’ll make a big change for both of us (me and the bike).
26 March 2014
Took the Bike out for a 5 mile test ride this evening, traffic lights, roundabouts, slow rush hour traffic, a good test for the clutch. Glad to say it all seemed to go well apart from me being a bit rusty but getting used to the gears, brakes etc. I’m going to adjust the throttle tomorrow as there is some free play which makes it a bit difficult when pulling away smoothly. Didn’t take any new photos but I’ll take some when I’ve cleaned it up a bit.
29 March 2014
Put the fairing back on the nearside plus adjusted the throttle as there was a fair bit of free play in the handle. I think it’s better but test ride coming up next week.
01 April 2014
After a bad Sunday where we had an ambulance outside because of a prolonged attack of Gall Stone pain, plus I know the gall bladder is inflamed and is going to be taken out in the next 6-8 weeks, I felt ok today and yesterday. Managed to start some cosmetic work today. Removed the rear view mirrors, rubbed down with wet and dry as they were quite scratched, patchy and tatty, although grateful for getting them for free. Got some red primer and ‘Mini Chili Red’ which looks to be pretty close to the rear fairing colour. These two photos shows what they were like and after I’d painted them.


 Also painted the belly pan with black satin and the rear black bits on the Exhaust pipes.
Another ‘Before’ view of the mirrors. That’s not a crack by the way, I’m
going to see if it will polish out when I refit them.
Rear view mirrors hanging in the flowering cherry!
I’m starting to think I should have split this into sections, it’s a bit looooooonnnngggggg! It would not have flowed the same I guess to have to go from page to page, at least this is a continuous story.
Tomorrow I want to refit the mirrors and change the rear indicators if the weather holds out, but I could always pop it into the garage of course.
02 April 2014
Put the mirrors back on, not happy with the colour match but could be worse.
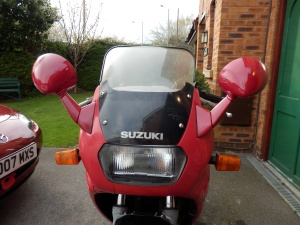
Also fitted the rear indicators but had to use front indicators due to a very seized nut on one of the correct size rear indicators. They are a bit wide but ok for now.
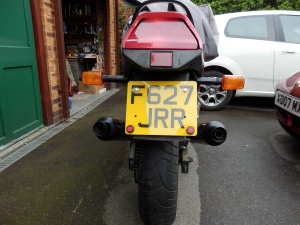
05 April 2014
Not a lot going on today, still got constant gall bladder pain so didn’t go to the Jet Age Museum as I normally would.
In between the rain I managed to spray paint the petrol cap as it was very tatty and polished the body of the fairing and the windshield. It came up quite well with ‘T-Cut’ but I have some proper stuff for doing perspex and I’ll have another go at it.
06 April 2014
Took a couple of photos this evening with it polished up a bit, not a deep clean/polish but it looks better. I also spray painted the fuel tank filler cap as it was looking very tatty.
still need some tidying up on the tank itself, fairings and wheels but it’ll come.


Got a new cover for the bike as well to protect it from the elements.
10 April 2014
Not been totally idle but a bit frustrated that the clutch adjustment appears to have reverted to it’s old ways of not disengaging the clutch when the lever is pulled in. Now it’s not starting as well!
I had the tank off today, fuel flow appears to be ok, plugs a bit wet but that may be from flooding. I cleaned each one and tested on the rocker cover but none of them seem to be sparking. Seems to be a big coincidence if both coils and all the HT leads have gone at the same time.
Wish I knew what I was doing!
11 April 2014
Had another look today but I really need to read the Haynes manual about checking  voltages, current etc and where to check. I might just go ahead anyway and change out the ignition coils, HT lead and spark plug caps. Expensive but they look pretty ropery to be honest.
I think it is definitely electrical and I’ve run the battery down trying it over and over again.
Had a go at the clutch adjustment as well, not sure it’s right but it is a bit freer when I pull the clutch lever in. I’ll leave the fairing off until I sort out the starting problem and then check out the clutch again.
23 April 2014
Just got around to the caps and ht leads due to being busy and weather. Changed all of the spark plug caps and HT leads but still no joy so just ordered new coil packs. Hope that sorts it out, frustrating after getting it MOT’d etc. and can’t ride it!
Simon, my mentor, has also suggested there could be water in the fuel so if the coils don’t work I’ll take a look at that as well but as I’m not getting a spark I’m pretty sure it’s electrical.
29 April 2014
Received the new coil packs a few days ago but only managed to get to it today. Put the new ones on the bike, screwed in the plug caps connected them and gave it a whirl. Nothing!
I’m waiting for one of those things that looks like a pen and shows if you have current flowing to the plugs. It’s got a ‘v’ shaped end which you put over the the HT lead and an LED lights up if there is power.
If it’s not that then I have to dig further back in the electrics.
This morning I also loosened one of the bolts for the carb bowl. Fuel ran out and looked clear and fine so I don’t think I’ve got water in the fuel. Could be float problem though as the smell of fuel is strong even when not using the choke. Doesn’t seem to be any fuel leaking anywhere and the fuel is flowing into the filters.
First thing is to check if power is in the HT leads, hoping to have this little tool tomorrow. Just looked on ebay and it’s called ‘Automotive Spark Plug & Coil Leads Ignition Coils Indicator Tester Testing Tool’, bit of a mouthful but hope it works.
01 May 2014
After some advice from a chap called Ian Giddings on Facebook I went to Maplins this morning and got a 100 Ohm resistor to go between the grey and red wires on the ignition loom. He thinks the resistor in the ignition barrel might have gone indicated by a reading of 12V on the grey wire. Tried to fit the resistor this morning but rain stopped play. When it clears up I’ll have a better go and take a reading before I try starting the bike.
Later;
Rain ease enough to get the cover off and have another go.
Separated the connector and tried putting the resistor across the bottom (loom side) of the connector but realised the wire of the component was getting hot so pulled it off quick. Reconnected the block together and bridged the resistor on the other side as in the photograph.
Took a reading and got 0.18, don’t know if this is good or not, may have damaged the resistor when it got hot, hoping it was just the wire but they are only 35p at Maplins.
Something did happen though, while I was putting the resistor into the separated connector block I had forgotten to switch off the ignition and there was a spark. Everything went off and I checked the fuses,  which were ok amazingly. I looked for other fuses, without any luck so carried on bridging the resistor across with the connector inserted.
Switched the ignition back on and power was there again! PFM is probably the explanation, as I used to tell my BT students!
06 May 2014
Over the past few days I’ve been testing voltages and continuity all over place with advice from people on FB. Aidey rang from Mantra M/Cycles as well to give me some advice and reassure me that it can always be taken in and sorted out.
Chap up the road on FB is willing to come and give me a hand so I’ll do some more testing in the morning, let him know the results and see if he can come over. I’m starting to suspect the CDI box though.
07 May 2014
Video of voltage fluctuation at the CDI when cranking the engine. However, it shouldn’t be at 21V to start with, so I’m told, and there is no readings on the bottom connector so looking for a replacement CDI.
08 May 2014
Got a second hand CDI from ebay for £30 including P&P so that’s pretty good. A new one can cost as much as £640 !
Just awaiting delivery so will report when I receive it and it’s fitted. Lets hope it sorts the problem or it’s off to the workshop.
12 May 2014
So it wasn’t the CDI, I presume I haven’t got two u/s units.
Nothing for it now but to call in the cavalry from Mantra Motorcycles! Booked in for Thursday 15 May.
03 June 2014
Sorry there’s been no news lately. Ade, from Mantra Motorcycles, picked up the bike a couple of weeks ago and he’s just waiting for the bike electrician to have some time free to look at it.
Popped in last week and it’s being looked after and is inside the workshop out of the nasty weather we’ve been having.
05 June 2014
Got a call today to say that the bike is running after installing new plugs, ok at gentle speeds but when opened up it gets a bit rough. Clutch working ok now.
Lloyd, at Mantra Motorcycles with Ade, suggested the fuel colour didn’t look good and I told him it was a mixture of old fuel and I’d been topping it up from a can that I fill when I fill up the car. He suggested that changing the fuel would be beneficial and did I want to go for a bit more work to get it running more smoothly. I agreed of course.
Second call from Lloyd said that it was running better and he thinks the fuel was running a bit rich. Changed the fuel and also the air filter which can be a cause of rich running. We had quite a discussion about carbs, sonic cleaning etc. and I might get that done if it doesn’t settle down.
He also suggested not going too far for a while and seeing if it settles down itself as bikes don’t like not being run regularly. I was thinking of biking it to Throckmorton, near Pershore, this weekend but I’ll give that a miss until I’ve run around locally first.
So, picking it up in the morning, ride to the museum to have a look at the Vulcan security system, which has been modified and I will need to update the operating procedures. Looking forward to being able to ride around a bit.
06 June 2014
Picked up the bike but while getting the
briefing about what had been done Lloyd turned it over to start it. No joy at first but it did eventually fire but was very lumpy. The day before it had started and ran smoothly on 4 road tests.
Anyway, it improved enough for me to be confident enough to get to the Jet Age Museum, where I had to check something out, and back home again – WRONG!
Picture of a dead bike!!! (N.B. Left the fairings off to make it easier for the workshop to work on it.)
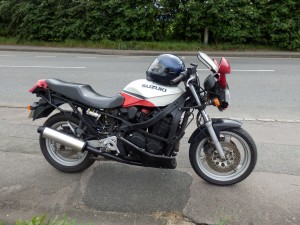 Going through Churchdown it cut out completely twice, restarted and I got to the Museum.
Left the museum after starting as it should and ran smoothly for best part of a mile and then cut out again. It wouldn’t restart except momentarily. Sometimes it would rev to 6000 and cut out sharply. I called Mantra and Ade came out with his van. I debated with him about whether we should take it home and I’d fiddle with it, not knowing what I’m doing mind you, but he offered to take it into the workshop to check out a couple of things that are fuel related.
Carbs definitely need doing at some time, maybe replacing altogether but to be honest I don’t know that I want to spend any more money. There has to be a point when you say that’s enough.
So it’s back with Mantra and he’ll call next week to say it’s ok or to say what needs to be done and the damage financially if I want it done.
11 June 2014
RIP Suzuki GSX750FK 1989!
The call came today and it wasn’t good news. Ade had spent a couple of hours draining fuel from tank and bowls, new fuel, no joy so continued but could not find anything else that might be causing the running problems.
Including everything, parts, exhausts, fairings, seat, cluster, lights, coils, leads, fuel pipes, caliper seals, rear suspension, welding, various cleaners, lubricants, liquids of other sorts, tools to do the jobs, paddock stands, and £400.00 on labour the bike has already cost me over £1,4000.
I’ve enjoyed doing it, I’ve learned an awful lot about what makes motorbikes tick, made some great ‘virtual’ friends along the way and been amazed at the generosity of the biking fraternity both in sending parts and with their advice. A HUGE THANK YOU to them all, they know who they are 🙂
I’m looking for either a Suzuki Intruder, Honda Shadow type bike but, for this project, all there remains to do is to see if it’s feasible to sell as a non running project although it would be more prudent to break it and sell individual parts, I’d get some of the money back of course but it would take time and probably be a lot sadder!
Whatever I decide to do this blog is now closed, I will not be updating it in the future, there’s nothing more to say.
13 June 2014
No, not all FRIDAY the 13th’s are bad. This morning I turned the bike over and got some clattering, popping, whirring noises. My first thought was that it sounded like misfiring.
I loosened the fuel tank and pulled it back to expose the coils and plugs. Got out my diagram for the coils and HT leads and quickly realised number 2 and 3 leads were transposed.
Swapped the leads/plug caps, cranked the engine and there was no clattering but there was firing and the engine started. I kept it going despite the petrol smelling fumes and the calls from upstairs that I’d stunk the house out with fumes. My wife, Marlane, went around shutting the windows at the front of the house.
Next move was to call Mantra Motorcycles. When the phone was answered I just said “Listen to this” and held my phone closer to the bike. “What is it?” Lloyd said. I told him it was the doomed Suzuki GSX750FK that Ade had brought back to my house the evening before.
He was flabbergasted, even more so when I told him what the problem had been.
Lloyd had put new plugs in which got the engine running again, although it was very rough etc. (Problems described above). He’d used a wiring diagram for a GSXR instead of a GSXF. He presumed they would have been the same. I had expressed my doubts at the workshop when I heard it clattering and clanking.
I rode to the workshop to pick up a couple of bits that had been left and the engine cut out on the way back but it was just fuel. Switched to reserve and it was ok.

So, just when I was on the verge of giving up again, but this time on the advice of mechanics, it appears I have a bike again.
Next step is to remove the carbs, all of the components, clean everything with carb cleaner except the rubber gaskets and diaphragm of course which don’t react well to carb cleaner. I’ll put it all back together and see what happens.
Watch this space!
18 June 2014
Still running well but found the headlight main and low beam aren’t working. Bulb appears to be ok, checked with a voltmeter, so I suspect there’s an earth problem since Lloyd said he’d ‘tidied up’ some of the wiring. After finding he’d put the HT leads back on incorrectly I’m not so sure the tidying up went as well as he thought!
20 June 2014
Seems to be continuing to run ok so going to use it for the Museum run tomorrow, round trip of about 10 miles.
Checked the bulb just now with a spare car 12V battery and it is fine so it’s either the switch or something to do with the wiring. Lloyd isn’t back until next Tuesday 24 June so if I haven’t fixed it by then I’ll pop down to see if he remembers which wires he fiddled with.
23 June 2014
Didn’t use it on Saturday because I couldn’t get it out because of the Mother in Laws car and didn’t want to wake her up! So, been out for ride today to check if it’s cutting out but performed beautifully. Timing is out and the carbs need cleaning but it is running nicely with the odd pop!
Put it on the sidestand so I can have a go at the gasket around the clutch cover without draining the oil.
26 June 2014
Haven’t done the gasket yet but the headlight problem is resolved. I looked and looked and fiddled and fiddled with the wiring but not a flash from the main/dip bulb.
So, I reckoned when Lloyd fixed the throttle for me maybe something slipped in the switch, which is part of the same control cluster.
Popped down to see Lloyd at Mantra Motrorcycles and he had a quick look around. Spotted a female and male connectors under the tank which weren’t connected. He could see the colour and that the male was coming out of the loom from the headlight. He offered to keep the bike and take a look at it later but I had not spotted the connectors so said I would take it home and let him know if that is what the trouble had been. It was, so I gave him a ring to let him know and said thanks for spotting it.
So just the oil leak to sort and carbs in the Autumn and hopefully that should see it running better and give me confidence to ride some distance next summer.
Today I also put the nearside fairing on, it’s the one I got from Brian French, not the right colour but I want to have a go at the cracks in the other fairing set that I’ve got. Offside can go on when I’ve done the leave from the clutch cover.
30 June 2014
Received the gasket from Wemoto and fitted. Hope that it was the clutch cover where the
 leak
leak
was coming from!
So, if that’s fixed there’s nothing left to do really until I have a go during the winter. Wheels off and a good clean, maybe get them painted/powder coated. I’ve got two sets of side fairings so put the odd coloured ones on, they are not the right red, and I’ll do up the other pair repairing the cracks and get them painted.
Only problem I’ve got, which I didn’t have, is I can’t get the bolts into the very front of the fairing, underneath the headlight. I’ll have to slacken off the mirrors to give some movement and try again but it’s not urgent.
Ran the engine to warm the oil to check the gasket fitting was ok. Some oil was on the ground but I’m pretty sure that is from when I opened up the clutch cover and oil poured out! I was hoping, because I couldn’t see any oil in the little window, that it would be low enough to get away with doing it on the side stand. No such luck! So, there was oil in the belly pan and I’m hoping that is where the oil on the ground came from.
If you want to hear what the engine sounds like now I took some video
15 July 2014
Not a lot to report recently, had a go at the oil leak as above but it proved to be leaking and not just what had gathered on the belly pan. I obviously did not clean up the edged of the cover and/or the engine side of where the gasket fits. I did find some bits of lumps which I gently scraped off. Got to be very careful, that aluminium casting is quite soft.
I replaced the cover after also using some ‘Liquid Gasket’, can’t find my tin of Heldite anywhere. I tightened up the Allen bolts carefully as I’d already stripped the thread on one of them but only about 2 turns worth. I found a same size Allen bolt which was a bit longer and put it in place of the shorter one. I wish they’d make it obvious where the longer ones fit, two of them were longer and I’m sure they were top left and right, certainly not bottom where I stripped the one. Anyway, still had a slight drip but I went around and gave the bolts a little extra tighten, I was a bit wary after the other one stripped so easily.
The drip now seems to be fixed so fairings are back on and run scheduled for tomorrow evening when I go to the museum for a booked group visit.
I’ll see if I can get a photo of it with the Vulcan 🙂
26 July 2014
Nothing to report as I’ve been laid up since the 21st after a gall bladder operation, with complications which meant they couldn’t use keyhole surgery. It’s going to take until late August before I can do much.
Didn’t get a photo of the bike with the Vulcan, it was chucking it down and the people in the group visit turned up early so didn’t have much time for anything other than looking after the visit.
Good news is that the bike ran well and didn’t let me down at all.
22 September 2014
Bit optimistic thinking I would be ok by late August, went back to the Museum last Saturday, 20 September.
Planned on riding the bike but after starting it every couple of weeks to make sure it was ok I got my gear on, opened the choke, pressed the starter and she burst into life.
Unfortunately, with the choke open, I revved. This caused the engine to cut out and it hasn’t started since.
I’m sure I just flooded it but I’ve had the plugs out, dried them as they were wet, gave the contacts a little rub with wet&dry but no joy.
I’m going to take the plugs out tomorrow and leave them out for a day or two to make sure it’s all dried up. I’m thinking the carb floats may need looking at, or the needles.
25 September 2014
Did that, put the plugs back in yesterday (24th) and it fired straight away. Ran for about 15 minutes before cutting out. Restarted ok but kept cutting out after a while, sometimes quite quickly. Not sure if it’s fuel flow, maybe I’ve pinched a fuel line when putting the tank back on. Further investigation to be carried out but I’ve offered it for sale on the OSS Facebook and Websites
I have enjoyed doing this rebuild. and really enjoyed riding this bike the few times I’ve managed it, but I’ve never hankered after a sports bike. I’m more of a comfortable custom/cruiser Honda Shadow, Suzuki Intruder, or even Harley Davidson type. Only problem with Harley that I’ve been told of is the running, servicing etc. costs. Probably go for a Shadow or Intruder.
Lets see if I get any decent offers, not too hopeful but if it goes to someone who can sort it out properly I’d be happy.
17 October 2014
Really is the end of an era now. No response from OSS so when I returned from a trip to Oman I put the bike on e-bay.
Starting price of £250 is really to catch people attention, I’m hoping it will go for a good bit more than that but the objective was achieved, surprising even myself!! I wanted a difficult project to learn mechanics of a bike and to see if I could get it running and roadworthy. Achieved when it passed the MOT last March, 2014, and even ridden it around locally.
I have now purchased a ‘new’ bike, 1998 Honda Shadow VT750C, which has only done a little over 6000 miles. Picking it up tomorrow, 18 October 2014 from Corby. I’ll ride it back to Gloucester, fingers crossed that all goes well and it stays dry!
This will be my new bike, I think I deserve a treat!
I’ll make the last post when the bidding has finished and the Suzuki has departed. Bit sad but that bike taught me an awful lot.
 18 October 2014
Picked up the Honda today, bit rough for a while, had old fuel in it but Clive, the seller, had put new plugs in and changed the oil. When I left his house I filled it up with new fuel, I don’t think there was much of the old stuff in there.
After about 60 miles you could feel the difference, it picked up and was accelerating better than it had been. By the time I got home, 120 miles, we were both used to each other and we both felt a great affection building between us 🙂
One bidder on the Suzuki, looks like he’s a breaker. Not what I wanted for it but if he wins it’s his bike to do with what he wants I guess. One bloke came around this morning to look at the Suzuki and he thought the engine itself sounded rough, apart from the obvious carbs needing sorting. He is local, living in Gloucester, which is why he was able to pop around.
22 October 2014
Well, it sold for £330.00 on ebay so the end of an era. Still to be picked up but it was someone local in Gloucester so at least they can ride it home rather than have to get transport, unless they’d rather get a van.
I’ll take a photo of it leaving.
23 October – Hang on, it’s not quite over yet. The bloke that won it at £330 had a row with his wife about it and had to pull out!!
The original bidder was given a second chance at it and so it is going for the asking price of £250. Well, never mind, that’s life and I never expected to make money out of it and, as said a million times, it was the experience I wanted and I got that in bucketful’s.
Should be picked up on Sunday afternoon after I get back from the RAF Masirah and Salalah Association AGM in Brum.
The new buyer, Andy, rang and he seems like a really nice bloke. He’s suggested a photo to end the blog with, excellent idea so watch this space after Sunday afternoon.
SUNDAY 26 OCTOBER 2014
Really is the end of an era today. Andy picked up the GSX this afternoon, bit of a to-do getting her into the back of his van as we didn’t have a ramp.
I had some laminated chipboard which I’d screwed a bit of wood to so it could be supported. Tried a bit of a worktop, tried a jack, finished up with 3 bits of broken chipboard!!!! Just too heavy for it.
Marlane came out to ‘make a suggestion’, one of her more favourite expressions, funny how they are always followed by a great suggestion. She said why don’t you get your metal ladders down and put the chipboard on the ladders, they should be strong enough. Worked a treat. Problem is that no-one had a video running when we tried it with the chipboard, could have doubled what I got for the bike !! 🙂
Took some photos, and Andy messaged me to say she’s in Salisbury and tucked up with his other bikes Kawasaki ZRX1100 , Yamaha FZR1000 exup and his mates Suzuki 600 fazer. At least she’s got some company now and some new friends.


.
The end?
Andy said he’d send something when he’d done some ‘Fettling’ of the carbs and general tidying up I think. So it might not be all over yet.
01 November 2014 – Updates from Andy.
“Took the GSX out for an initial run. Some hesitation between 5 and 6k revs initially. Then she started to clear. Was able to rev up to 8k then on deceleration she died. Looked like the fuel was low. Took a while to restart roadside. When she did she revved to 9k in each gear but not above. She was running ok apart from not revving above 9k. On deceleration she didn’t die so it must have been low fuel why she died before. Then got some hesitation between 6 and 7k again but apart from that she sounded good.
Very good engine . I think the carbs will definitely need a clean but it sounds more like fuel starvation. Could be dirt in the carbs or a fuel line or a tap issue. Overall she’s a solid bike. Reckon I could run her daily without a lot of issues. Will clean the carbs though and check the fuel flow. No oil leaks apart from the oil evident at the bottom of the engine.
Will remove the fairings and clean and monitor. She started straight up today on first turn over. Handles well. Might keep her. Do I need 3 bikes ? You can never have enough I say ? Thanks again for selling her. She’s in good hands and will have a good home whether it’s mine or another. Only other prob I had was the key bending when I tried to open the fuel cap. It has a crack in it. Not sure if I can get one to the same key number. I’ll see if some one can cut one to pattern. Anyway Dave I’ll keep you informed on progress. Also took my Exup out today. If you want a fast bike that one is mental. Andy.”
08 November 2014
Latest update from Andy;
“I took of the side panels off the GSX and cleaned the engine with brake cleaner as I noticed oil on the floor so I wanted to see where it was coming from. Ran the bike for 15 mins and found the leak was the rh oil cooler pipe where it bolts to the engine. So I will replace the washer and then hopefully no more leaks. The carbs will be off in the next 2 weeks to clean. Still amazed how good the engine sounds… very sweet for the year. Within the month she will be running sweet. Obviously Dave has done all the hard bit… im just putting the finishing touches to the project. Wiil be nice to see another 80s classic on the road. Andy.”
11 November 2014
Mother in Law is no David Bailey but a couple of weeks ago she decided I needed a photo of myself on the Shadow. Here it is!
Also getting involved with the AFB (Armed Forces Bikers) and the RBLR (Royal British Legion Riders).

9 November 2014
Went during the evening to help out with the poppy appeal at TESCO Brockworth, Gloucester, and it was raining. Wouldn’t have been too bad but they are still building houses on the route so the bike got filthy with mud on the road. Luckily the next day was really nice so managed to get her out of the garage for a wash and scrub up.


Also managed to get hold of some bags, quite small but very useful. I’ve put the straps underneath the pillion and got chromed support bars for them.
Like the Sissy Bar and Backrest. Thought about removing it and the pillion to put another rack on but it looks good and I can always bungee baggage to the backrest.
The screen was from ebay, good value compared to some of the funny money they ask for them. Decorating with RBL Riders badge, Poppy support and RAF Station crests that I’ve served at abroad (Luqa, Masirah, Seletar and the one that’s missing is Gan but hoping to get that one to complete the collection).
January 2015.
Rode back from the Forest of Dean during December. It was dark and wet and when going around bends with traffic coming towards me I couldn’t see the bend so had to really slow down.
What I needed was spotlights and so that’s what I’ve got now!

26 October 2017
After a trip to Belgium and completing the 500 mile route of the RBLR1000 ‘Iron Butt’ ride fundraising for the Poppy Appeal, I decided I really need a bigger bike.
I researched for a few months and decided what I would like is a Honda Bagger F6B, expensive and I would have to wait for the redundancy money to come through. Either the Bagger or an 8 or 10 year old GL1800 Goldwing. Either way I wanted to stick with Honda.
End of July some redundancy money did come through and in the meantime I’d been reading a lot about the Honda CTX1300.
Just at the right time the local Honda dealer, THUNDERROAD Gloucester, had a white CTX1300, 3 year old, come into the showroom. I booked a test ride and was absolutely hooked on this amazing, terrific, and very manoeuvrable motorbike. All the weight is low making it feel much lighter than it’s 338Kg. Even the fuel tank is below the riders seat rather than between the handlebars and the seat like normal.
Needless to say I bought it especially when they offered £1,500 part exchange on the Shadow, which I’d paid £2,000 for 3 years earlier.
I picked up the CTX on 15 August and am thrilled with it 2 months later have attended a few events and creating a huge amount of interest wherever it goes.

Rear light above and me riding into Shipston on Stour 20 October 2017
Below is the top fairing taken on my test ride in early August, right at Michinhampton country fair.


Right – Riders eye view. I changed the position of the satnav and camera after riding for a week or two. Camera is now down by the wheel above the offside fog/spot lamp
Left – Front fairing showing headlamps mirrors and indicators in the sticking out lugs.
Spot/fog lamps can be seen in the lower part of the photo. Crests are RAF stations I served abroad and in the centre the Royal British Legion Riders Branch crest.
(RAF stations Masirah, Gan, Seletar, Luqa)
I really think I’ve found my bike for life now, it’s big, it’s comfortable, it’s stable, fuel economy is pretty good at around 56mpg on a long run and not going toooo fast.
11 May 2019 – NEARLY TWO YEARS LATER
Still loving the CTX1300, I’ve been to Belgium and what a difference riding this than the Shadow. Still miss the sound of the V Twin though but we are talking two bikes that are worlds apart here.
I’ve also done the RBLR1000 on the CTX, 1000 miles in under 24 hours. It was a piece of cake on the CTX, although when I got home (another 175 miles!) I slept for 12 hours 🙂
Only problem I have, and really it is the only problem, is the weight. I’m 70 now and I do have trouble pusing it around if there is a bit of a slope. I’ve dropped it, mostly gently when I’ve realised it’s going but when I get into a full lock situation moving it around that is when I get into trouble.
I have popped into Thunderroad a few times since getting the CTX, for services, pick up bits and pieces and sometimes just for a meander and a chat with Richard the sales chap.
I’m starting to look for a lighter bike, that might mean going back to an 800 – 1000 cc rather than the 1300, might even mean going away from HONDA, which I swore I would never do. The Suzuki intruder is looking pretty good but would I seriously be able to let the CTX1300 go. We’ll see, and I will update this blog as things progress.
P.S. thought I’d add some more photographs.
My grandson, Lennon, pretending to ride!
He loves being pillion but at 11 he’s a bit young yet.  Me after a veterans funeral

Added some go faster stripes to the tank, just looked good I thought.
Also took the pillion back rest off and added a top box, it’s big and it was cheap, does the job perfectly.
08 June 2019
After riding the CTX1300 for 2 years I found I was dropping it more frequently, as above. Love the bike, just haven’t got the skill, or the strength maybe, to push it around by hand.
I did find another bike. Test rode a few, Suzuki VL800 intruder  which was a stunning bike to look at but didn’t like the constant vibration. When I’d had the hours test ride my feet and hands continued to tingle for a good while afterwards.

Liked the Honda Crosstourer 1200 but it was just a little too high.
It was a DCT transmission too, first time I’d ridden an automatic bike. Took a little getting use to but very good when I did.
There were a couple more but I spotted a Harley Davidson in the dealership, 3 years old. Booked a test ride and immediately realised this was something I should have been riding for a long time. Yes, it did vibrate but not like the old Harley’s. They have added rubber bushes to the frame and engine mount to lessen the vibration and, as it is Harley vibration it comes with the territory.
Harley Davidson XL1200T Sportster Superlow
This was my first view, unprepared for the showroom as it had only just come in with a part exchange customer. The damp patches are from a quick wash, it is air cooled and it definitely was not oil or Dot4 hydraulic fluid.
It’s a good looking bike when all cleaned up, got a couple of marks on the bags and a reflector was missing, on the offside. Now I realise what people mean about expensive Harley parts. Just over £23.00 for an orange reflector!
My first outing was the Armed Forces Day in Gloucester, 27 June 2019. One chap said “Where’s your Starship Enterprise bike” and I pointed to the Sportster. Everyone was in shock that I’d traded in my beloved CTX1300!
24 June 2020
So now it is coming up to a year, 24 June, and I’ve really got used to the Sportster, love riding it and it does suit me better. I was being a bit too ambitious with the CTX1300.
The Sportster is only 100cc less than the CTX but it is nearly 100kg lighter, makes a big difference to me when moving it around. It is also lower.
 Not ridden much in 2020 due to the Covid-19 lockdown but had 5 rides, 3 from Gloucester Brize Norton where our daughter is stationed, to take her some shopping as she couldn’t get out. Another twice to the Forest of Dean to another daughter for the same reason.
I haven’t done a great deal to her so far, took the sissy seat back off and added a large top box for
when I go camping, changed the headlight for an LED one, much better and wider light, put a Harley engine guard on the front, and fitted a 12v accessory socket for the sat nav and charging other things.
Did a fair bit of riding during 2019, nothing very long but attended the RBLR National Rally in Taffs Well, near Cardiff. It absolutely poured down all the way there, large areas of surface water on the roads and motorways. Boots got soaked inside as did the leather cut etc. However, the Harley performed perfectly in the wet, not a hiccup. Other events were the normal county shows, memorials and commemorations.
Looking forward to the lockdown finishing completely so we can start attending events and functions once again.
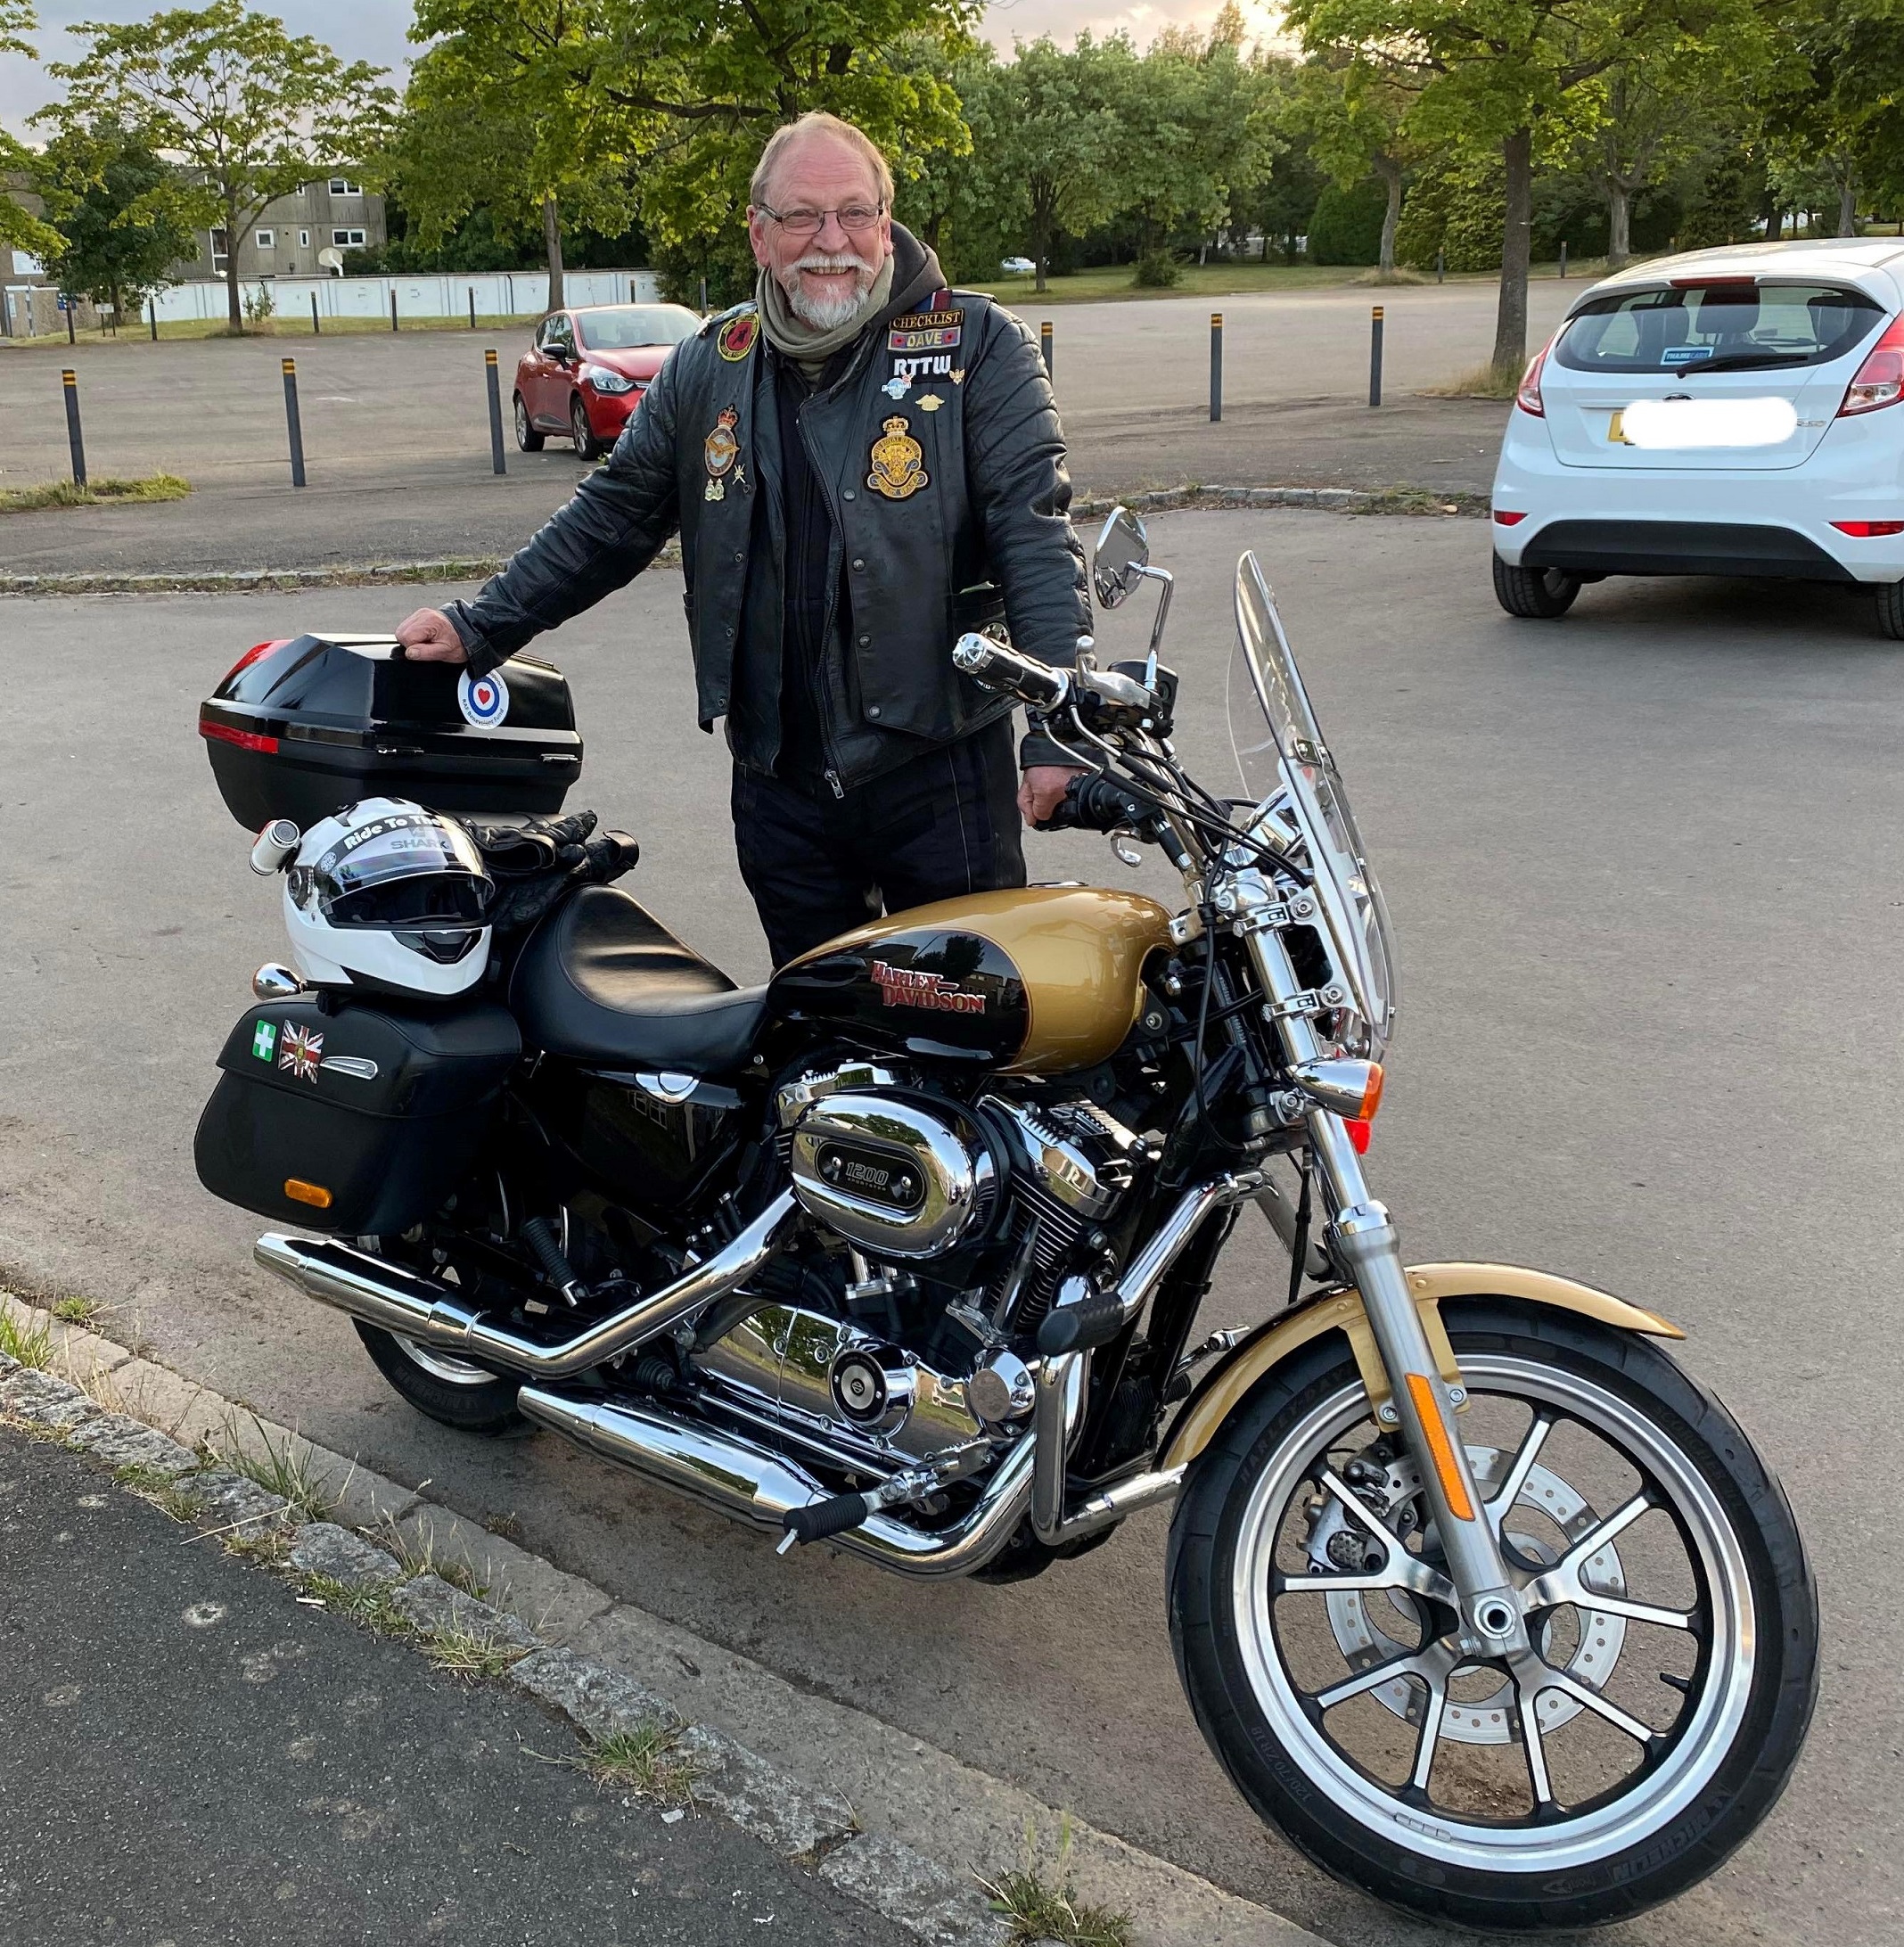
A ride to RAF Brize Norton to drop supplies off to our daughter during the first lockdown of 2020.
I have various trips videod on YouTube;
‘Biking About’ playlist = https://www.youtube.com/playlist?list=PLmwLktY1sm0QNBkFUn74V3W-ALy02O6bF
‘Harley Biking About’ playlist = https://www.youtube.com/playlist?list=PLmwLktY1sm0Tad4IAp5iyCJ5H0_R6Qqq7

Brilliant stuff!!
Update?
Hoping to start clearing the garage in a couple of weeks. Son and D-in-Law moving then.
I’ll update the blog pages when I start on the bike again.
Hello Andrew, I’ve stared doing updates to the blog again as well as posting on the Facebook page of oldskoolsuzuki.info
You are welcome to pop in for a browse every now and then.
Cheers
Dave
Hello Andrew, I’ve made a few updates to the blog since your posting. I’ve made a lot of progress up to Christmas and then this month I think I’m nearly there!
Cheers
Dave
Hi Dave, the front paddock stand …..one lug goes under the fork leg the other behind,
Thanks Simon, I hadn’t noticed those indented surfaces under the forks. I’ve corrected the seating of the stand.
Took a couple of photos today, didn’t do any work, other than hacking back a load of ivy in the garden but that didn’t do much for the bike!
Cheers
Dave
get some brake cleaner (aerosol) and spray the parts with it whilst agitating with a brush, ,
my rear wheel is in front of the coffe table, just had a new rubber fitted, so took the opportunity to clean the rim and sprocket carrier prior to it having new fitted, hope to fit it to bike, adjust and lube chain and ride it on sunday.
Rear wheel in front of the coffee table! My wife would want a divorce if I started stuff like that HAHAHAHA.
Thanks for the advice again, I’ve got carb cleaner but I think the brake cleaner will come in handy again in the future so I’ll get some of that as well.
Cheers
Dave
thats nowt, when i had my own place when we met, i had a loft boarded and insulated to use as a spary bay, was found washing plastic panels in the bath, with me in of course… but i look after her bike too, and am better at ironing …
just found your blog (by accident…was actually looking to find the fuel tank sender resistances on the same bike!) I’ve got the same bike ’91 (H) and i’ve just got mine back on the road recently after it was sitting in the garden/damp garage for 6 years. I had the same problem with my brakes. rode to the MOT and the front end had completely binded (I had some strange looks when it took two mechanics to push the bike into the garage!). All i did was ride it back, pulled off the calipers, wedge a peice of wood between 2 of the opposing pistons, using the lever, pumped the piston till one moved nearly all out, then clamped that with moll grips, popped the other one out. Did the same for the remaining pistons. cleaned the calipers with WD40 and ‘polished’ the piston cups with oiled 1200 grit paper. I used the old seals, putting them back I smeared the pistons with vasolene. Took an afternoon to do and re-took the MOT next morning and passed!
Thanks Nick, that sounds encouraging 🙂
I’m doing this partly to learn how to do stuff on bikes. Getting advice from the blokes on Suzuki Old Skool has been great and with a bit of trial and error I’m getting there.
Been a bit quiet for the past few days, can’t do much until the welding is finished plus other domestic stuff getting in the way!
Thanks again for the comment, hope you have many years of happy and safe riding.
Cheers
Dave
I’ve recently developed another problem, nearside fork seals have gave up, so i’ve got fork oil running down the stems…one thing after another! (local mechanic wants £150, is it worth DIY’ing?)
yep, give doing fork seals a go, first time is daunting but i’ve done about 7 sets by now, most of the cost is labour,
what weight oil does your manual say to use, 5W or 10W, i would up it and use a higher weight, i.e, 15w firms up the front nicely.
Pingback: David J Rose – 2013 | David's space
When I’ve got questions like that I use the Old Skool Suzuki facebook page https://www.facebook.com/groups/oldskoolsuzuki/ I’ve seen a few comments on there about replacing oil seals and it doesn’t look too difficult.
It’s worth giving it a go if the bike is not your only transport.
A good read – thanks for that. I was really happy when you finally got the engine turning over 🙂
Wow, it’s been ages, and I thought mine was talking a long time.
PS. don’t forget the ‘temporary’ Old Skool Suzuki forum – http://old-skool-suzuki.proboards.com/
Take care and keep up the good work!
Garret
Thanks Garret, yes, over 4 years is a long time but most of that time I haven’t been able to get at the bike at all! I’m a moderator on the OSS temporary website, looking after the ‘sales’ section.
Liked the stuff you are doing, I’m just trying to get it working and on the road legally. It’s a massive learning experience for me.
I used to do stuff on my old cars (Ford Anglia (1953), Ford Consul (the one like the Zephyr), Triumph Herald but then cars got too modern to work on much!). So with this project I was looking for something I could work on and this has been a real challenge building it from the wreck that it was!
Thanks for the great comments and encouragement.
Dave
That’s cool, so am I – Media.
See you there.
G
Hi
I have been (as amazing as this) street fightering my GSX750F at exactly the same time as you’ve been rebuilding yours. (To a better standard than you’ve been fixing) It’s been an emotional rollercoaster with issue after issue as she’s had a very abused life but touch wood she’s going to be MOT’d on Thursday – 2.5 years later. Its been lovely to read your project and only wish id done the same with mine buy alas I have a few pictures. It fills me with joy to see old girls brought back to life like this – mines 1year older than I am!!!
Good luck and if your ever in Lincolnshire – give me a shout.
Thanks
Steve
Thanks Steve, that’s very kind of you, as you know yourself it’s been quite a struggle. I’d agree that pretty much anything would be a better standard than what I’ve been doing but my aim is just to see if I can get it on the road, MOT’d and legal before I concentrate on looks.
I came up to Lincolnshire, Stamford, to get the fairings and other bits a while ago. If I’m coming back that way I’ll certainly let you know.
Good luck with the MOT on Thursday.
Cheers and thanks again
Dave
Thanks. Well it was stock looking when I got it and I’m fairly happy with the result. I’ll share my Dropbox folder if your interested in a look. I’ve still got to re-re upholster the seat and wash it but fingers crossed for Thursday. I have lots of the old bits for sale if ever needed by anyone. Good luck for the future. 😉
Steve
Been a while since i’ve read this thread, I’ve been using my bike very casually this year. It doesn’t like not being used! If i leave the bike for a week it holds back, then next day it’s running fine. I’ll be taking mine off the road again when the TAX is up, want to strip & rebuild, there’s planty of rust and loose wires, also because of no fairings, going to change the front end to a much smaller headlight, digital clock arrangement & possibly a rear-view camera (The original mirrors where useless…unless you like looking at your elbows! Got a twin rear light cluster from a moped, which i may mould into the seat or into a hugger mudguard.
So i may have a spare headlight coming up…
Nice to read about a bike being restored, I am using a GSX750F-K 1989 back and forth work and slowly working my way through the bodged jobs around the bike. So far min has had a full rear caliper strip and rebuild, new chain and sprockets going on this week, new front pads to do. The one thing I am working on is a fueling issue, did you ever get sent a diagram of the fuel lines? I will probably use your pictures as a guide for where they should go.
Thanks again, responded to the other post before I saw this one.
The photo of the fuel lines in the blog are all I have I’m afraid. I relied heavily on advice from a number of people on the Old Skool Suzuki Facebook page, and also the forum.
The old forum died but the ‘Temporary’ one is going from strength to strength and is worth a look if you are not already on it.
OSS Facebook = https://www.facebook.com/groups/104002846305974/
OSS Forum site = http://old-skool-suzuki.proboards.com/
The OSS blokes are unbelievably helpful and generous.
I’ve got some bits of fairings, side and the bit that goes underneath the headlight, a rear subframe, instrument cluster. If any of it is any good it’s yours if you can pick it up. I’m in Gloucester.
Cheers
Dave
gavin, i use cmsnl.com, robinsonsfoundry.co.uk and have an on line manual if you requiree a download, i ride the naked GSX750 retro/
I find CMSNL very good for reference but usually buy the parts from Wemoto – http://www.wemoto.com/bikes/suzuki/gsx_750_f_k_l_m_n/89-92/
Also forgot to add, this is a very useful site with the Suzuki micro-fiche breakdowns for each area.
http://www.partzilla.com/parts/search/Suzuki/Motorcycle/1989/GSX750FT/CLUTCH/parts.html
Thanks Gavin.
Now that I’ve got the bike MOT’d (last March) I’m selling it and looking for a custom/cruiser type bike.
I will certainly bookmark this link though, might very well finish up with an Intruder or Marauder.
Cheers
Dave
Thanks for the links guys, spent all weekend fitting a new chain and sprocket kit and cleaning/ servicing the front brake calipers.
simon, could you possibly email me the manual that you have?
I bought a Haynes manual, more convenient than refering to pdf’s or web pages
http://1drv.ms/Zc3C5o
Thank you very much. Gavin Williams From: David’s spaceSent: Tuesday, 7 October 2014 18:46To: gdwacca@aol.comReply To: David’s spaceSubject: [New comment] 1989 Suzuki GSX750FK Rebuild
a:hover { color: red; } a { text-decoration: none; color: #0088cc; }
a.primaryactionlink:link, a.primaryactionlink:visited { background-color: #2585B2; color: #fff; } a.primaryactionlink:hover, a.primaryactionlink:active { background-color: #11729E !important; color: #fff !important; }
/* @media only screen and (max-device-width: 480px) { .post { min-width: 700px !important; } } */ WordPress.com
simon commented: “http://1drv.ms/Zc3C5o”